|
This review could also look like this: „Visit
the website of www.autofx.com, watch the sample images and read
all the listed information.“ - FINISHED.
In contrast to this option I do rather invest
some more work and I only hope that you prefer the more detailed
version.
You are permitted to purchase the plugin
Dream Suite Ultimate Gen2 as a bundle with 36 effects and
presets, but you do not have to. The plugin is divided into different
groups and you can buy them at very reasonable prices as modules.
Not only can both purchase options can be used as plugins, but they
also work as standalone versions.
As far as the installation on a windows 7 64bit
system and the relation to Photoshop CS6 (Who needs the newer crap?)
is concerned, there are no special notes necessary, everything worked
properly.
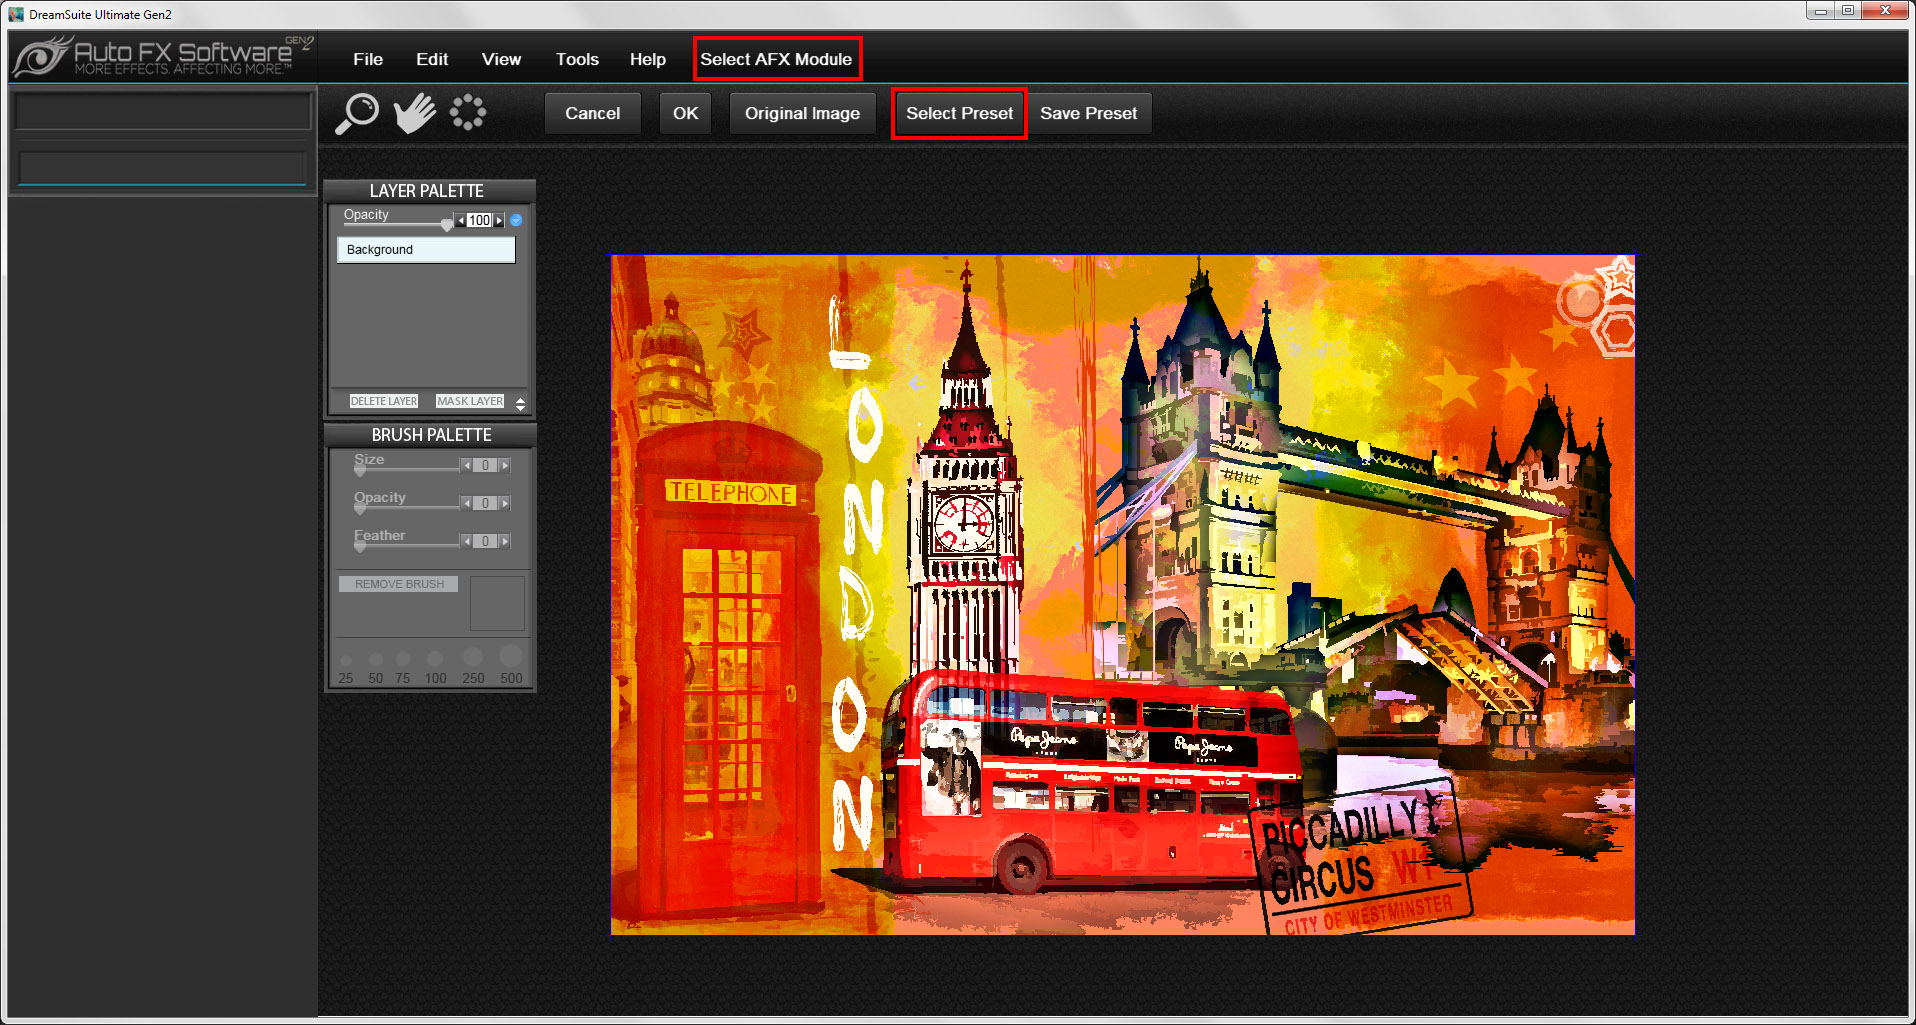
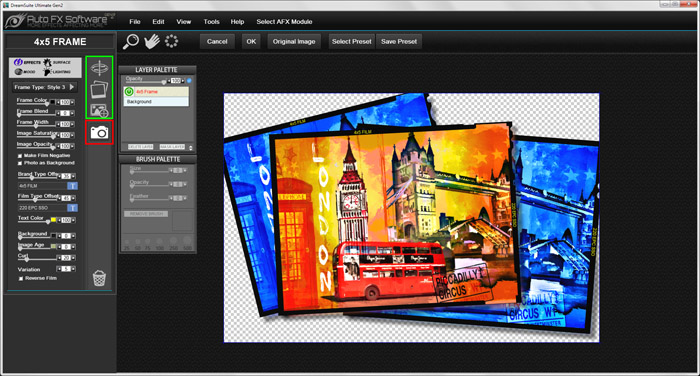
The User Interface

You can hardly do anything wrong here, everything is clearly layed
out.
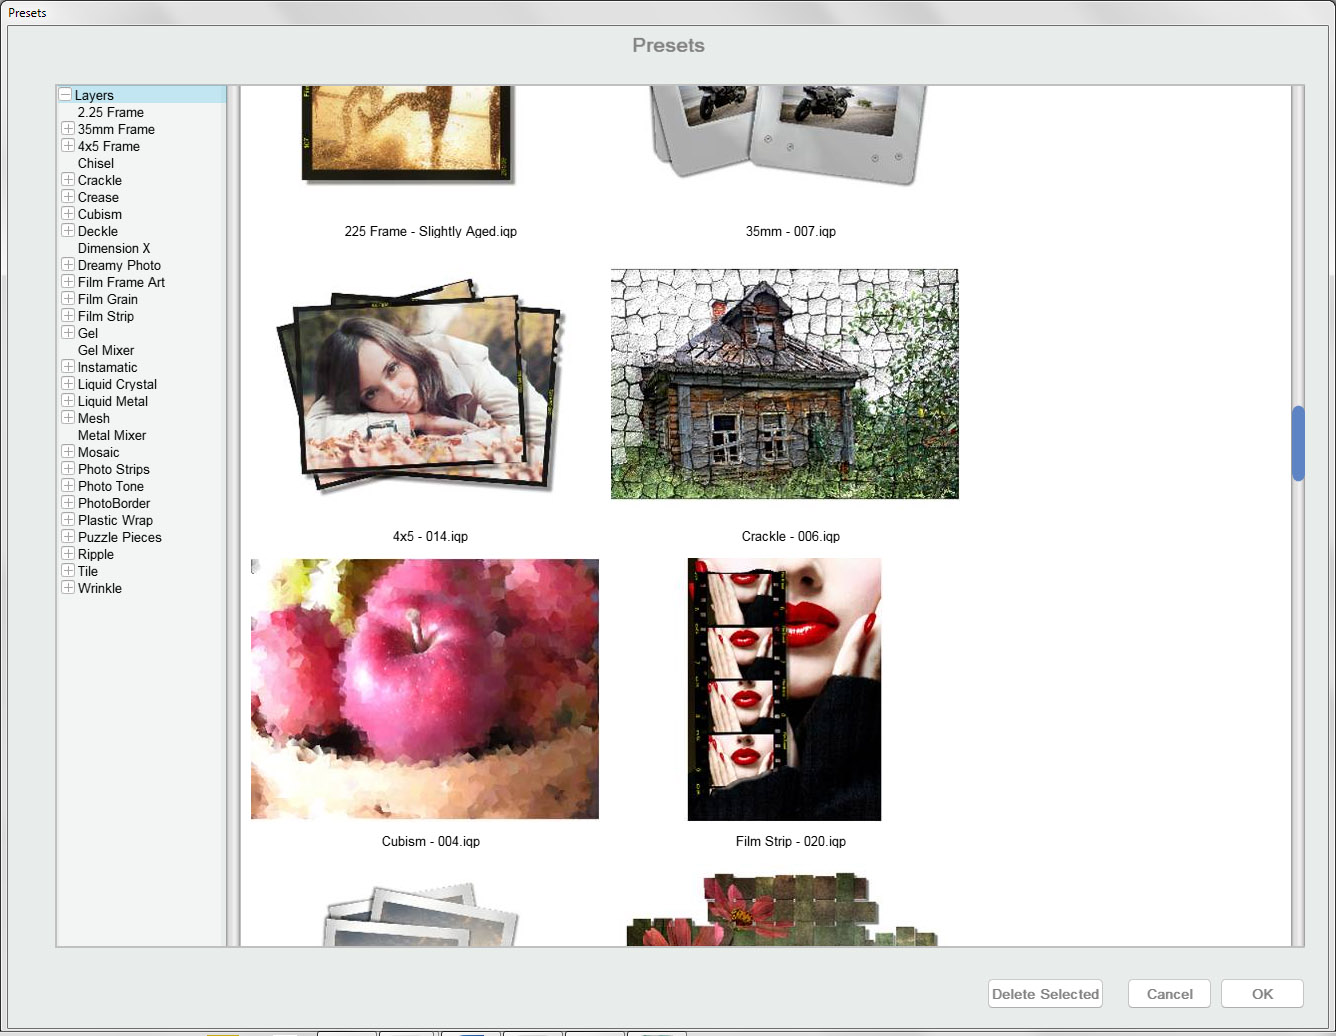
If you choose >Select Preset you are allowed to highlight
an effect in the new window on the left and on the right you can
select one of the presets.

To the left the effects are listed and to the right the corresponding
presets are offered.
You will also reach your destination this way.
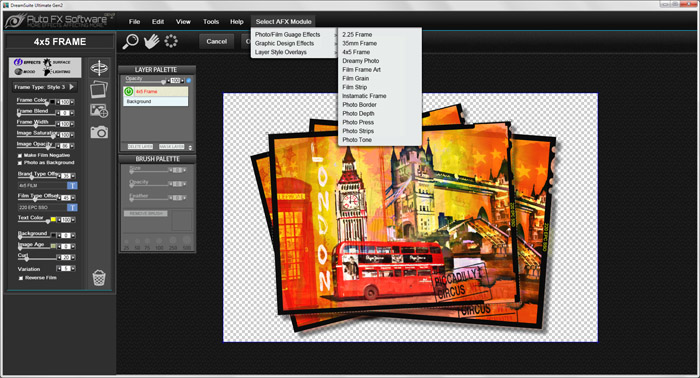
Why no do it differently this time? Activate the desired effect
via >Select AFX Module! This way the loaded image will
instantly be processed and you won´t see another thumbnail
before as shown above.
 |
|
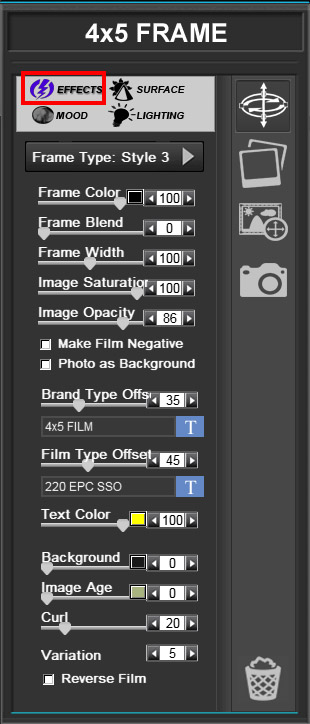
Settings for Effects |
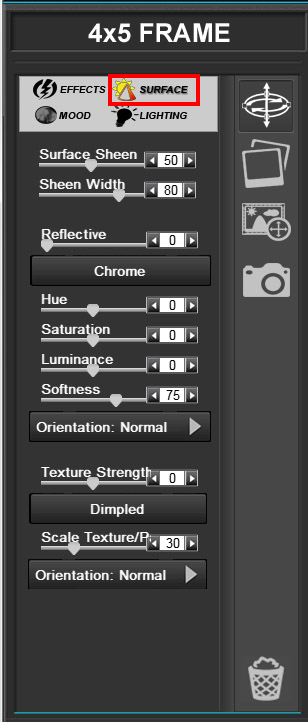
Settings for Surface |
| |
|
 |
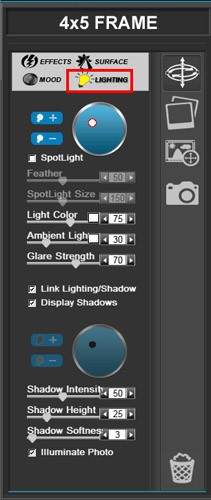 |
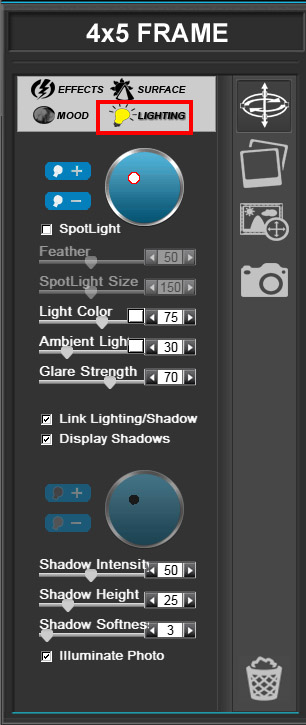
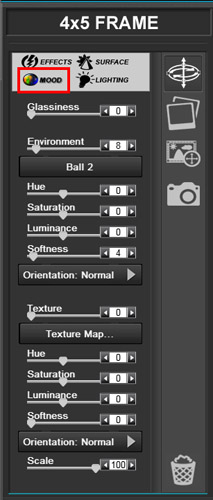
Settings for Mood |
Settings for Lightning |
If you do not want your effect to look like
that of "Mr. Everyone", but to radiate a personal touch,
then AutoFX provides this options for you with Dream Suite Ultimate
Gen2. As you can see from the screenshots, you can riot around with
Effects, Surface, Mood and Lightning.
Sample image with 4x5
frame
Up to now you could only see the sample image
in the UI screenshot. It is time now to also present my fabulous
artwork in full size with an effect attached.
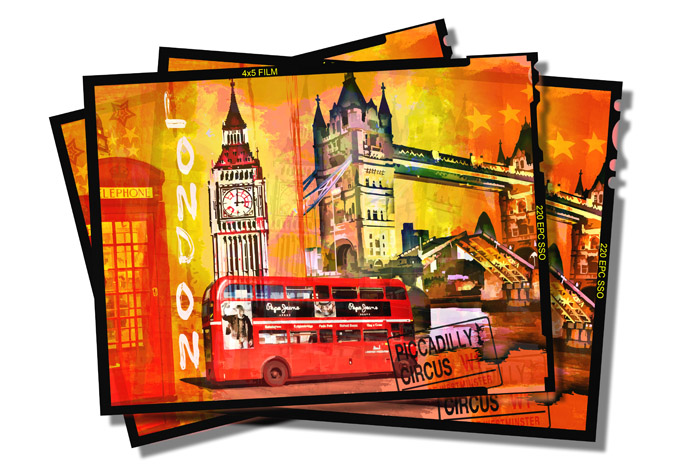
4 x 5 Frame – Preset 014 – Artwork: Kay Michael Kuhnlein
– www.a-dezign.de
There was no change applied to this example, it was directly taken
over.
Countless changes are realizable
The example above is meant to show you that it is no mistake to
start with a preset. Each of the image objects shown here was shifted
and two of the frame images were replaced by another image. In this
case it is a blue variety of the first sample image.
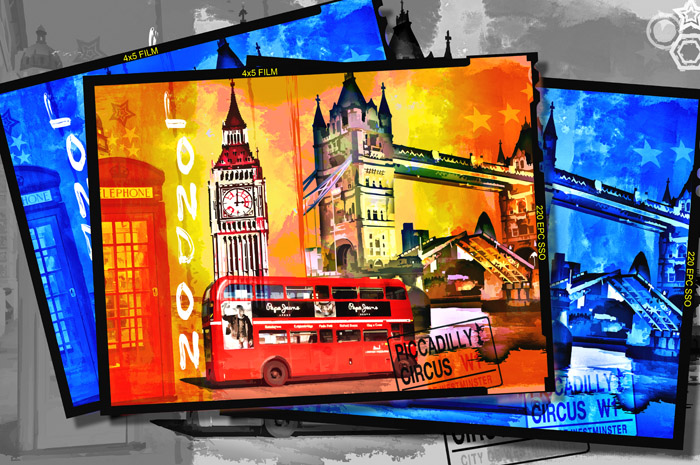
The result of my endeavors – Artwork: Kay Michael Kuhnlein
– www.a-dezign.de
The image with the grey background displayed here could also have
been created with Dream Suite Ultimate Gen2. As far as
this example is concerned, Photoshop CS6 served as the tool. Almost
all effects provide this enormous variety of shaping in order to
exactly customize it. There is hardly any desire left.
You may probably have preferred the effect
4 x 5 Frame with another exsample image, but taste is a
strange beast. Burger King is the favorite restaurant of one person,
someone else may prefer McDonalds and the next one, as a vegan,
does rather bite joyfully into a carrot. It is not very much different
when exsample images are concerned, in this case I decided, so doesn´t
it look great?
Still some short examples

Instamatic – Preset 14 – photographer: Silvia Kuhnlein
–
Artwork: Kay Michael Kuhnlein – www.a-dezign.de
Most effects work according to the same principle and offer you
numerous settings for completely individual results.
The processing displayed here is already somewhat
older, but I really do like it a lot. Let us view this image as
an incitement for an successful cooperation between Dream Suite
Ultimate Gen2 and Photoshop. You will find the Polaroid frame under
the name Instamatic, all the other effects like enlightening of
the background and dirt traces were created in Photoshop.
A striking thing are both adhesive tapes that
make both images stick on the wallpaper. To my shame I have to admit
that I have absolutely no idea where this effect results from. Neither
is guessing a help.

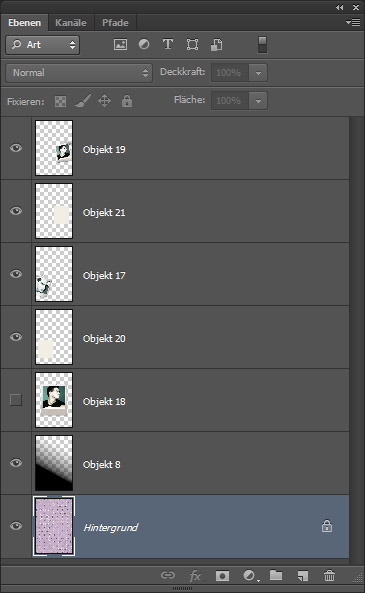
The layers in Photoshop
But all the same, the best solution for a successful image is almost
always the combination of plugin and Photoshop. On the other hand,
without the Instamatic effect much more worktime would have accrued.

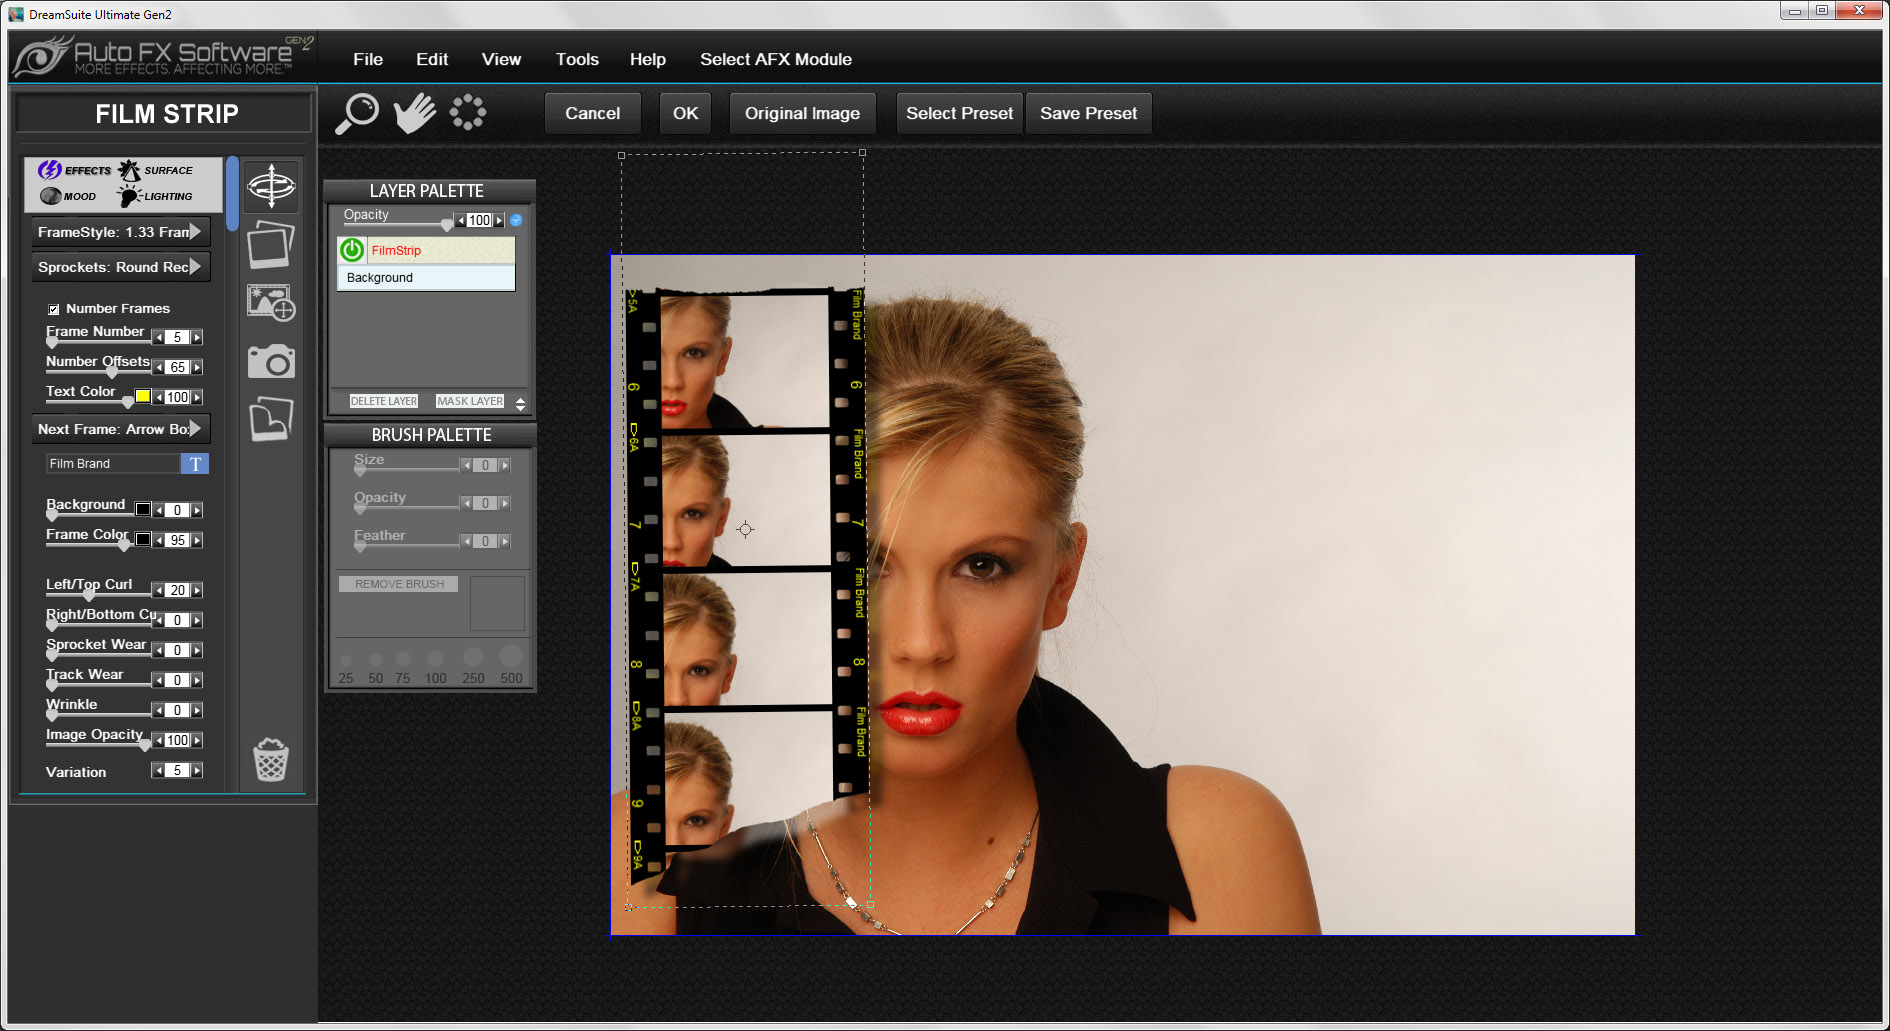
Film Strip – Preset 20 (without changes)
The Plugin offers a variety of different film strips that you can
– whatever you may prefer at any time - adjust according to
your imagination. For the following example I chose the effect Film
Strip – Preset 20. As in the screenshot shown before
the effect is displayed with the standard settings of the preset.
You are now allowed to get going.

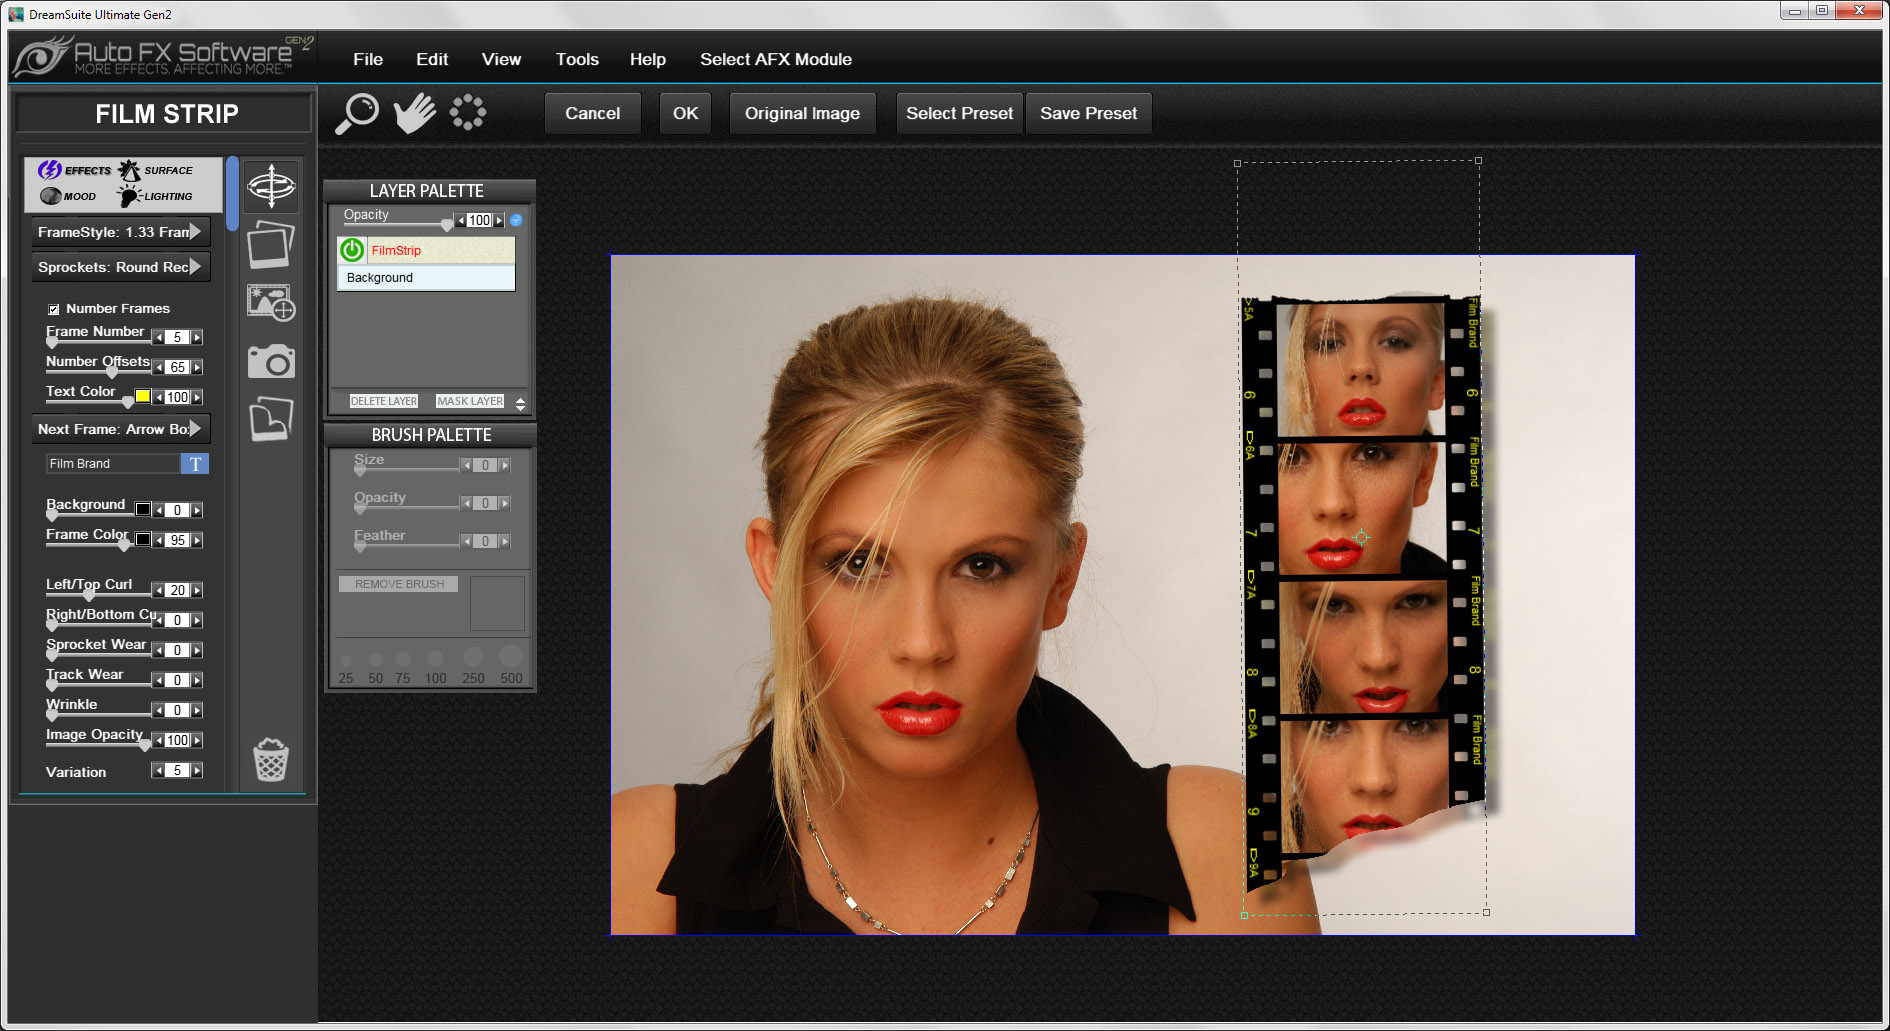
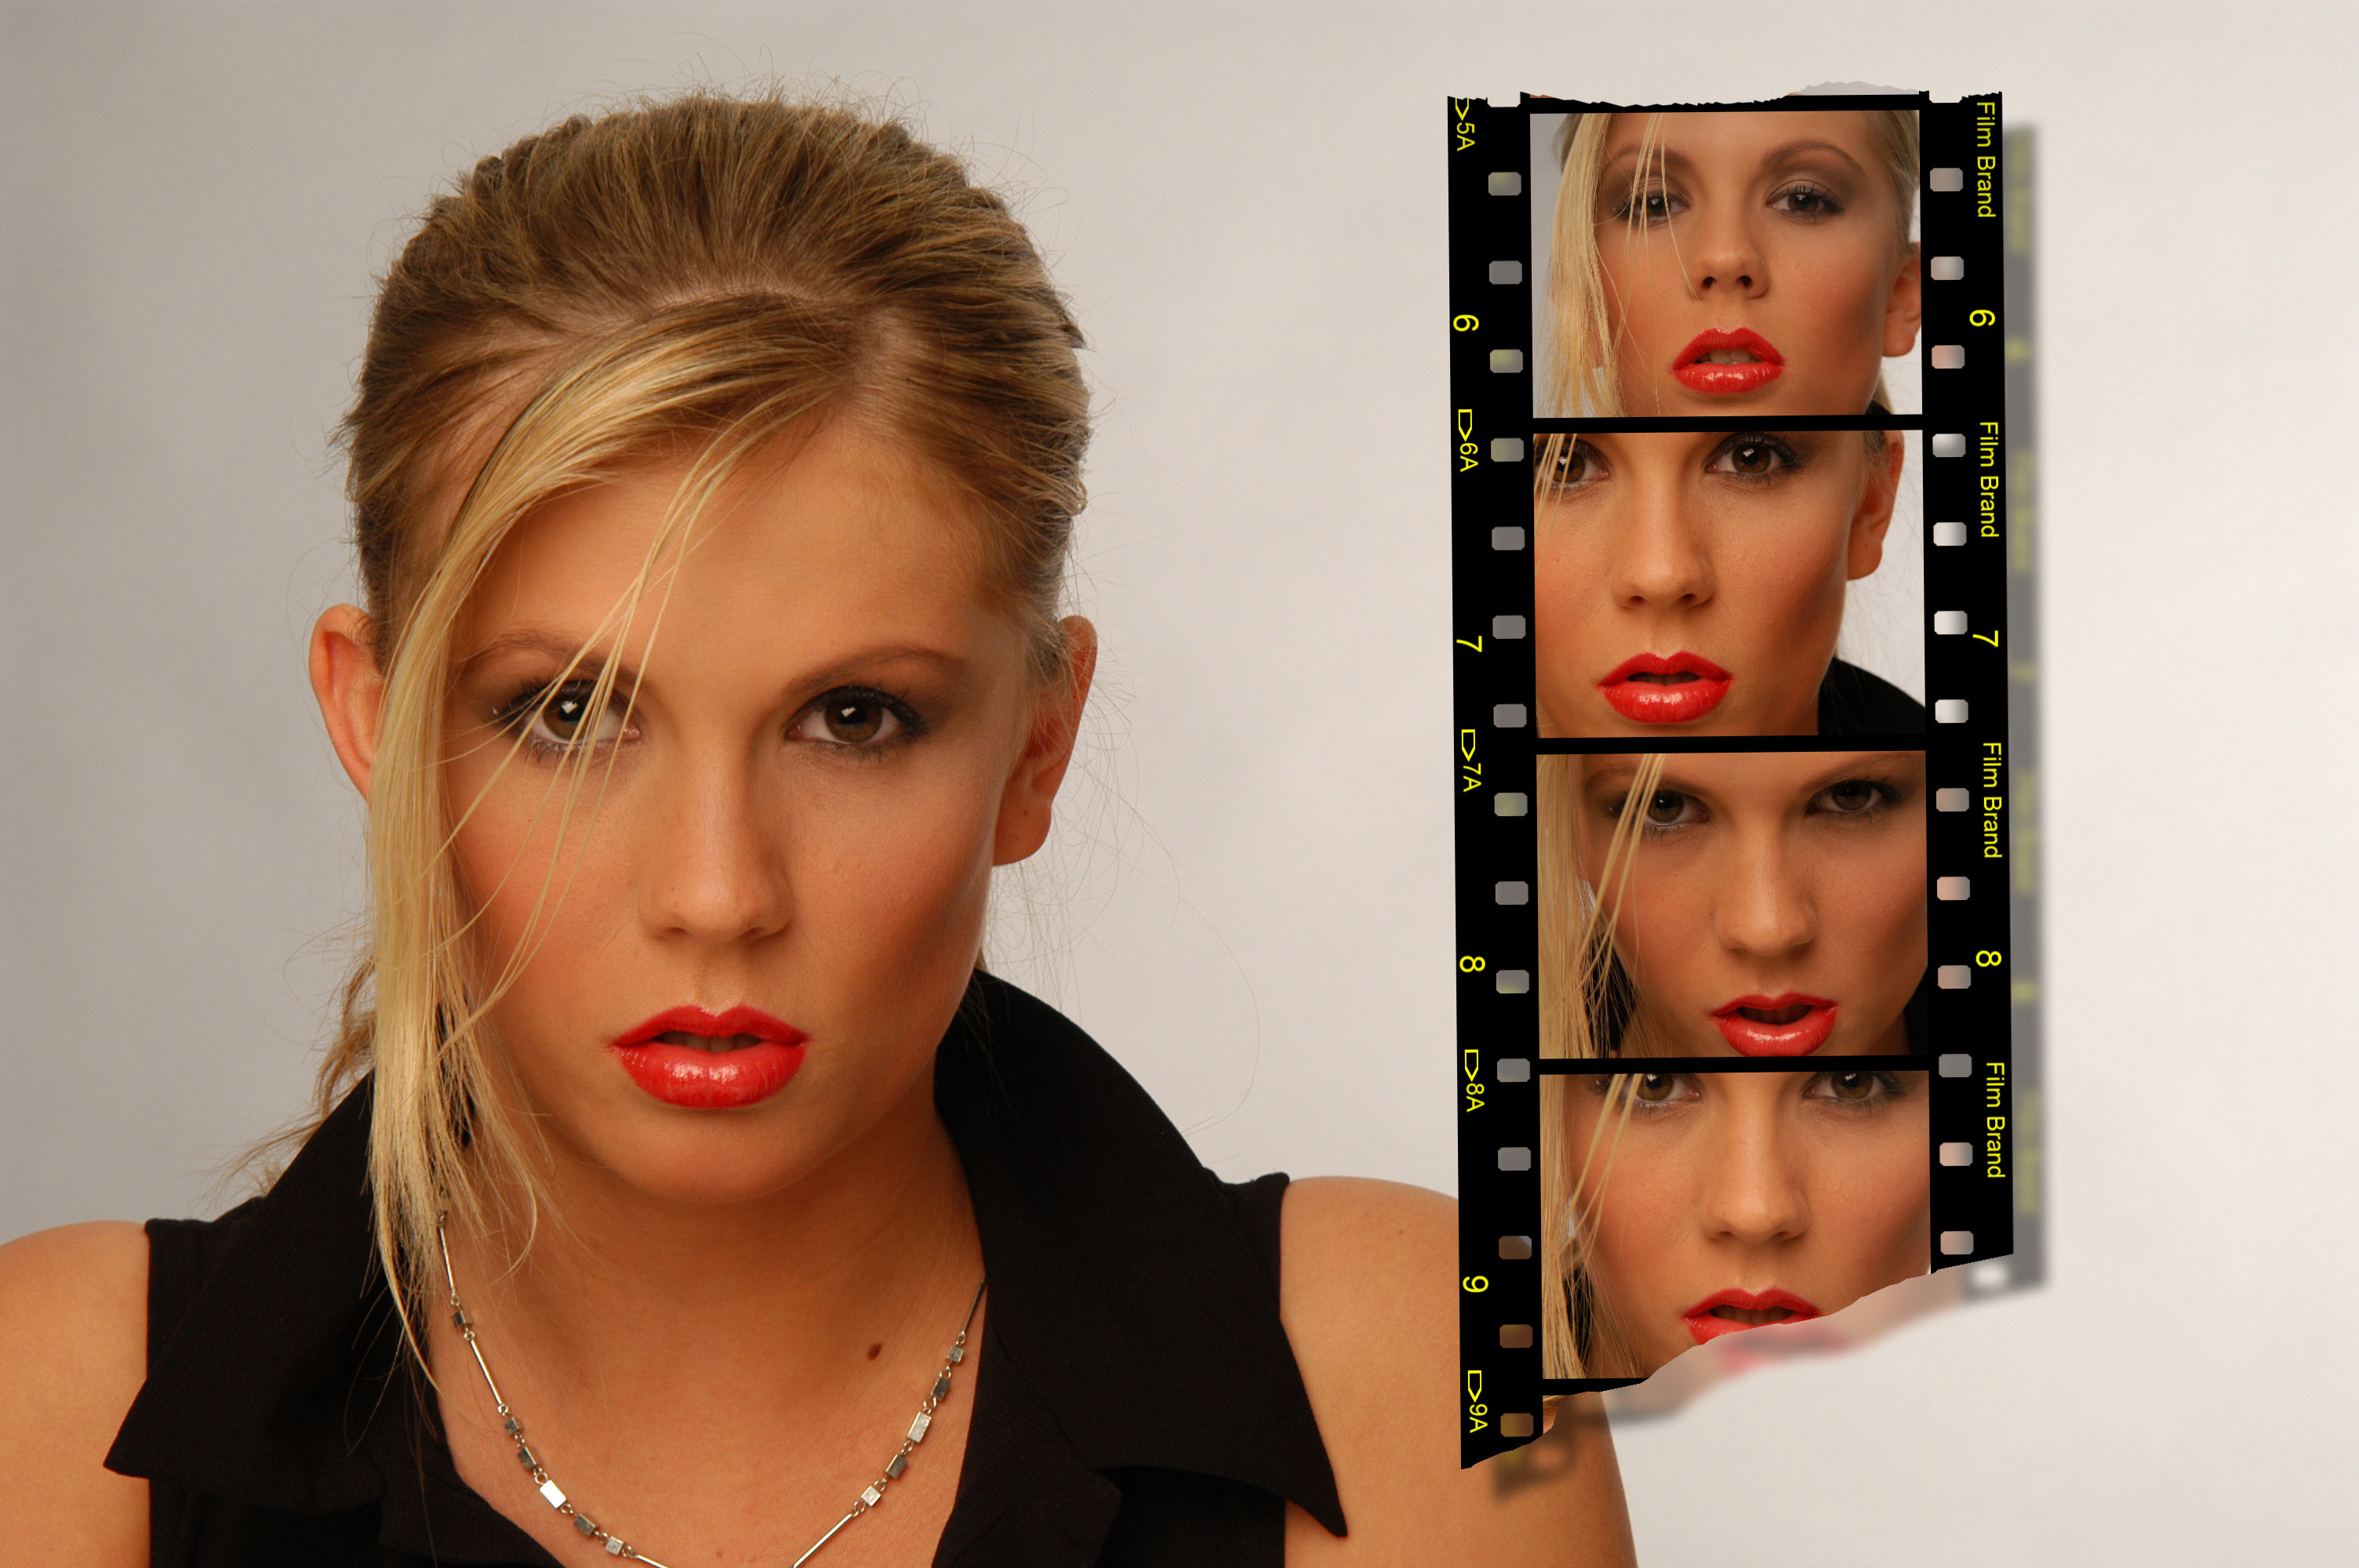
Film Strip – Preset 20 with extensive changes
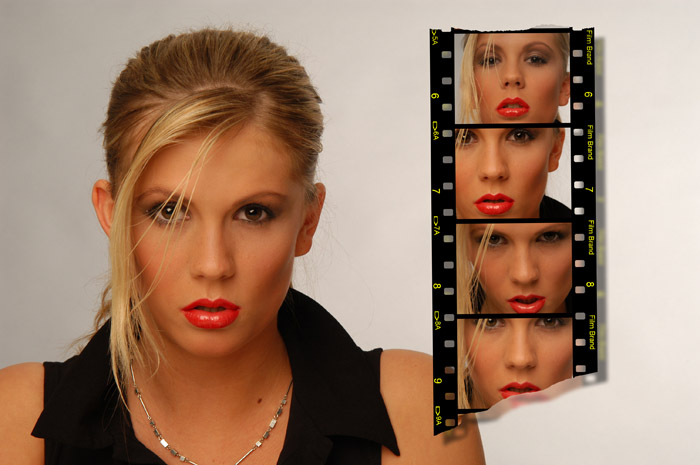
The plugin worked successfully – photographer: Michael Bernigau
– www.a-dezign.de
I adjusted Preset 20 as follows: Each foto in the film
strip was replaced by another image of the photo session. The complete
film strip with the new fotos including shadows was shiftet to its
final place. Yes, easy, but effective.
Graphic highlights in abundance
The Dream Suite Ultimate Gen2 Plugin still provides
a huge variety of graphic effects with individual setting options
which let a logo or other vector graphics become a real eyecatcher
and all this in the accustomed easy manner.

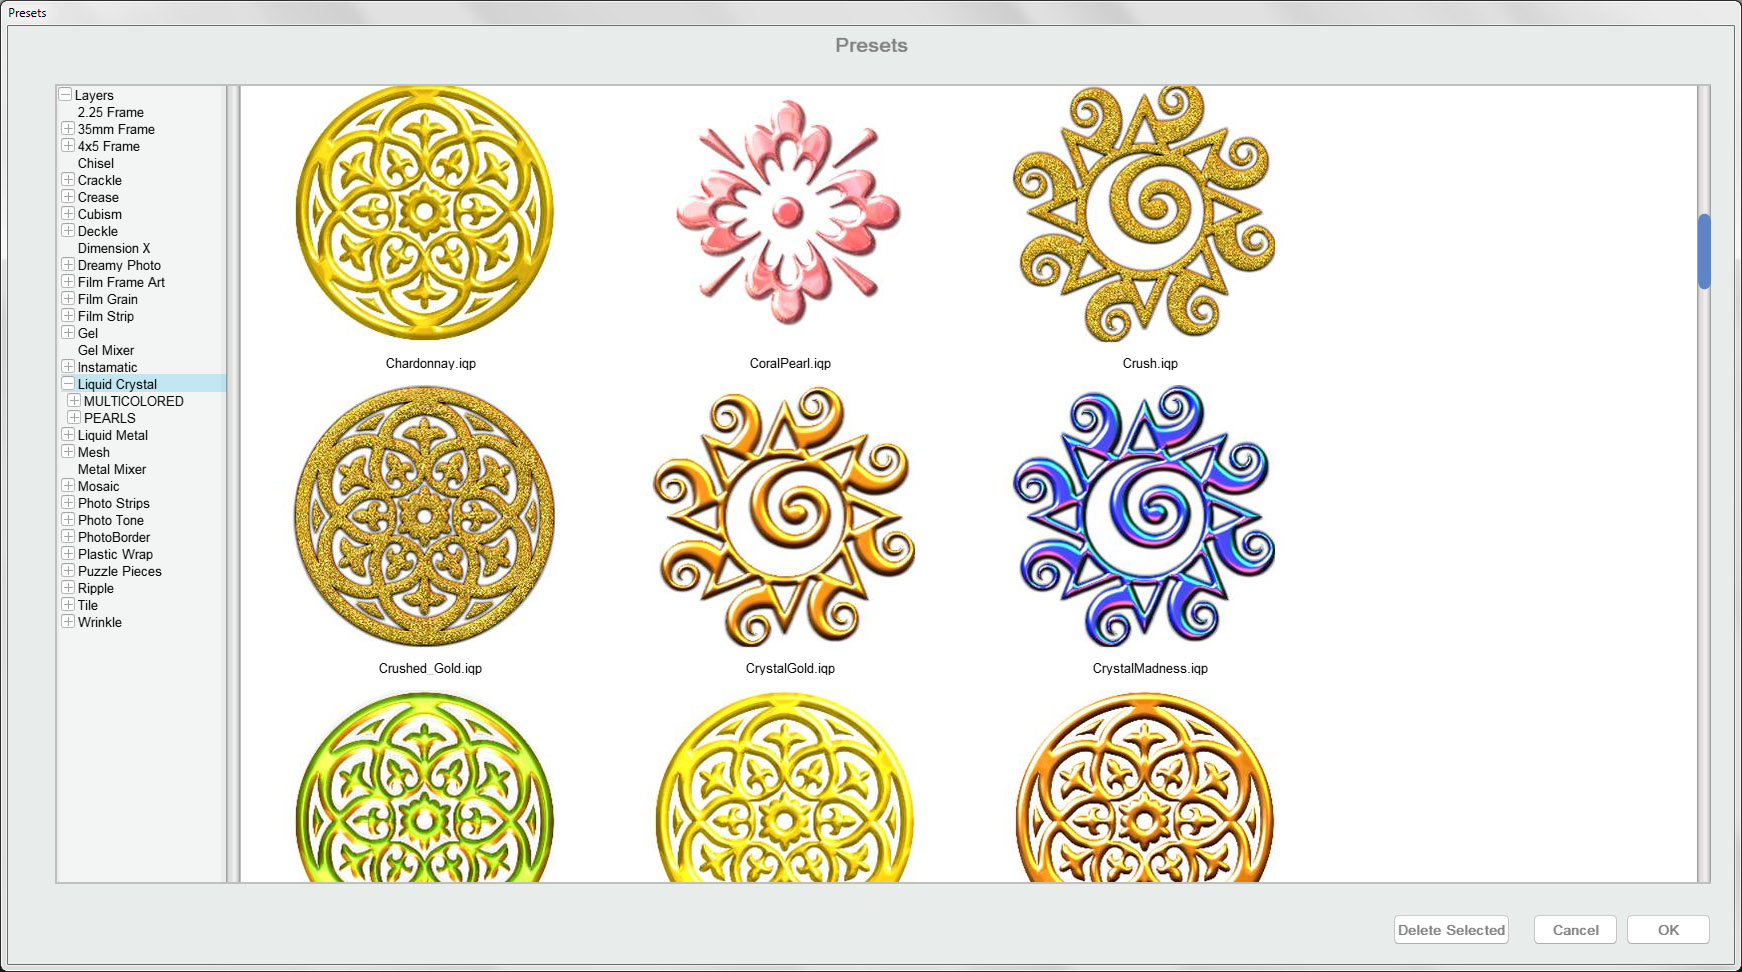
Presets for the effect – Liguid Crystal

Liquid Crystal – Preset CrystalGold (Original Preset)
On the left-hand side you see the original image, a graphic created
with Adobe Illustrator, placed in Photoshop. Then I successfully
produced „precious gold“ from the graphic. What a pity
that it only happened on my screen, I would rather have had it in
reality!

Liquid Metal – Different presets – Artwork: Kay Michael
Kuhnlein – www.a-dezign.de

Metal Mixer – Preset Chrome1 – Artwork: Kay Michael
Kuhnlein – www.a-dezign.de
Two more examples and we have already come to the end of the review.
In both cases again vector graphics served as the basic origin which
got their look with the help of both effects. Different presets
were used with the image Liquid Metal. As far as the Metal Mixer
image is concerned only one preset was necessary. For this, all
segments were masked one after the other before an object was created
from them. Only thereafter it was processed with the plugin.
If this review wasn´t detailed enough
for you and if you would like to know more, then I have a hint for
you. Visit the manufacturer´s website www.autofx.com.
There a fully working demo version is waiting for you to be downloaded.
Have a good time with it.
Kay Michael Kuhnlein
|