CREATING AN "INSTANT" REALISTIC RAINBOW
INDEX
If you're unsure what a rainbow should look like in a photo, do a search of photos in stock image sites on Google. Here's one site, and there are literally millions more. It seems there are also a million and one ways a rainbow can appear, so be creative!
Preset: #Hoods - Instant Rainbow
This preset creates a great instant rainbow on an 800 x 800 image. For other sizes it's as good as instant, because you will soon get the hang of changing the settings as described below.
-
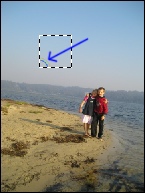
Choose a photo or any other image to which you want to add a rainbow. For now, start with the default settings of 800 x 800 and play around afterwards. The smaller the image, the greater the adjustments you will have to make.
-
Add a new transparent layer. Don't fill this layer!
-
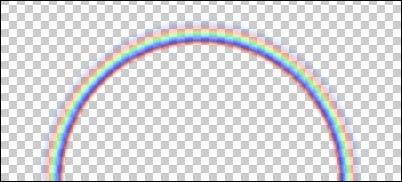
Open Plugin Galaxy and bring up the Presets list with the F2 key. Choose the "#Hoods - Instant Rainbow" preset, which should be listed near the top. You will see the rainbow as shown in the cropped screenshot below. If this is what you want, click OK and go straight to Working in your Graphics Program.
Adjustments to the preset:
-
On the Edge layer: the Size and Smooth sliders work together to create the rainbow arc. You will need to adjust both to suit the size of your image.
-
On the Rainbow layer: adjust the color rotation by moving the Angle slider.
-
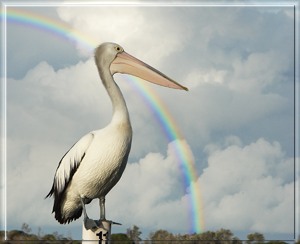
Adjusting the position: a partial, offset rainbow can often be more effective than a full semicircle. Theoretically, you can position the rainbow anywhere you want to, but it's very fiddly trying to get the exact same random coordinates for both layers involved. However, the good news is you can use the fixed positions provided to quickly and easily change the position of the rainbow to get a right or left quarter circle as seen in the header photo of the pelican.
-
Click on the SW or SE fixed coordinates on BOTH the Edge and the Rainbow layer. It's essential that these two layers have the same cross coordinates. The menu for a set of fixed coordinates is available by Right clicking on the coordinates in brackets at the bottom of the Preview window.
-
- Use your program's scaling tool/function (Ctrl T in Photoshop) to size the rainbow to your requirements, and to move it to where you want it.
- Adjust the opacity of the rainbow layer in the layer palette to your taste and requirements. Using the Overlay blend mode can improve the rainbow's appearance in some circumstances - try it. (You can of course set blend modes and opacity from within Plugin Galaxy, but it's more successful for this exercise to do it afterwards.)
- Blur the rainbow with Gaussian blur, only if you want to, to your taste and requirements.
- Lastly, use the eraser :
- with a soft, large brush setting at low opacity, to gently and gradually erase parts of the rainbow where it should fade into the image below - e.g. parts of the clouds, and/or
- with a smaller, opaque brush to remove any parts of the rainbow which you want to appear behind something in the photo. e.g. the rainbow over the pelican was erased where it fell across the bird's head and beak.
- You should end up with a very nice rainbow in a few minutes.
Broad Rainbows:
- The secret to creating a rainbow with broader bands yourself (from within Plugin Galaxy) is reducing the Frequency of the Rainbow slider to a low number, then decreasing the values of the Size and Smooth sliders on the Edge layer contents. What you will see on the Preview screen is a very tiny rainbow, with "fatter" bands. When you scale this up and blur it outside Plugin Galaxy, you will get a nice broad rainbow. See below.
- Once you have the size you want, use the Angle slider back on the Rainbow layer to get the correct spectrum of colors. Click OK.
- Back in your graphics program, deselect, then scale the rainbow up, Gaussian blur and otherwise modify things as necessary.
- Using Presets: If you are working on a large (high res)
photo/image - i.e. one that's significantly bigger than 800 x 800 -
the quickest, easiest way to get a broad band rainbow is to:
- Make an 800 square or 400 square empty selection on the transparent layer above the photo, and open Plugin Galaxy.
- Apply either the 800 Full or the 800 Half preset to an 800 square selection.
- Apply either the 400 Full or the 400 Half preset to a 400 square selection.
- NB: the smaller the square selection you use, the more you will have to scale the rainbow up, and the broader the bands will be.
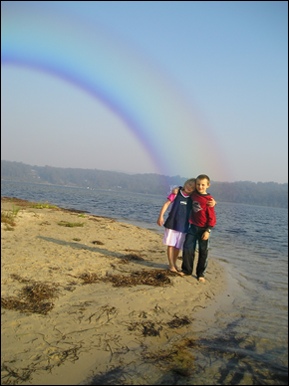
- You can see zoomed out screenshots of the stages used to get the rainbow used for the photo below which, in its original size, is a 1700 x 1200 shot.
 |
 |
 |