|
You can use the Sphere template you saved
in Part 1 of this tutorial to create a great bubble. Because
the transparency on the working layers of the image was locked
when you saved your template,
this bubble can be done in a couple of minutes.
- Click on the Sphere layer of your template. Open
Plugin Galaxy, press F2 and choose the #Hoods - Basic Sphere preset.
- In Manual Mode (F1) replace the Twilight layer with
one of the Rainbow FX filters. (Some will work better than
others for a bubble.)
- Use Shift + Reset to restore the default Rainbow
settings for the filter you choose - these will generally
give you the best colors, or a better starting point.
- Click the Shift box on the Rainbow screen to give
yourself more color variations.
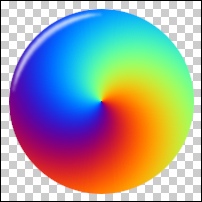
- Play around with the filter's settings until you're
happy with the outer colors on the circle, bearing in mind
that you will be removing the central areas later, as seen
below.
- In addition, you can alter the Brightness and/or reduce
the opacity (using the Blend slider under Brightness) for
this layer if you want to.
- The bottom plain color layer will only affect the
Rainbow colors if you change the layer blend mode or reduce
the opacity of the rainbow layer. You can get some great
bubbles using blend modes, so try that too.
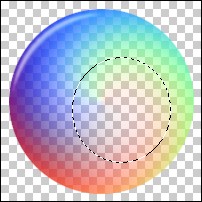
- If you are using a template as suggested, your circle
will already be perfectly smooth, as seen below, and you
won't need to do anything to the Edge layer.
|