SOLVING CROSSHAIR POSITIONING PROBLEMS
INDEX
|
|
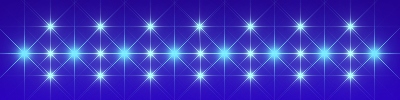
Plugin Galaxy provides several useful preset coordinate options when you right click on the coordinates you see in parentheses at bottom left of the preview window. However, the precise placement of the cross hairs elsewhere in an image can be quite tricky and frustrating. Creating something like the band of stars above would have driven me nuts if I hadn't come up with a better way. (These stars and two other variations are included with my Freebie presets.) In later releases of the plugin Harry will no doubt provide a real time coordinate feature such as that you have in your application, but in the meantime here are a couple of easy ways you can ensure you get multiple coordinates right.
Method 1
-
Before you open Plugin Galaxy, use your paintbrush to place a tiny but obvious dot on the parent layer in your application precisely where you will want your Plugin Galaxy crosshairs to be. (Don't worry about messing up the image you are working on, as you will go back and Undo this step later.)
-
In Plugin Galaxy, get your effects and layers roughly as you want them.
-
Turn Autopreview Off. You will now be able to see your dot/s on the parent layer.
-
Move through the Plugin Galaxy layer stack positioning the crosshairs by clicking on the dot/s you see on the parent background layer.
-
Turn Autopreview back on and voila! All your effects will have exactly the same coordinates, or very close to it.
-
If the dot is visible when you turn Autopreview back on, Undo the dot step in your application and hit "Last Filter Applied".
-
Too easy!
Method 2
Another way, which works really well for more complex things like the star band shown, is to create a grid pattern as a temporary background for your effects. To create a grid:
-
Open a new image with a dark background.
-
Turn on View Grid and set the grid preferences so that the grid is a bright, contrasting color. Set grid dimensions that will suit your purposes.
-
Crop the image so that you see a perfect set of grid squares.
-
Take a screen shot of the image with the Print Screen button and paste the clipboard to a new image.
-
Crop the pasted image so you have only the snapshot of the grid.
-
Save the file for use whenever you need it.
-
-
In Plugin Galaxy, work against the grid image to set up your Plugin Galaxy effects and follow the procedures suggested for Method 1.
-
When you're satisfied, exit Plugin Galaxy and get rid of the grid.
-
Return to Plugin Galaxy and apply your perfectly coordinated effects against the background, photo etc. of your choice.