CREATING A
BASIC SPHERE
|
 |
 |
- Create a new 200 x 200 square image. (Initial values in the presets have been set for this size.)
- Add a new filled layer, any color. (Just duplicate your background layer.) This will be your working layer. Name the Layer "Sphere" in your application's layer palette - this will be helpful if you want to save your file as a template for creating spheres at a later date. You will see why that's a good idea as we go along.
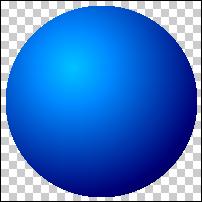
- Open Plugin Galaxy 2 and press the F2 key to bring up the Presets menu. Click on #Hoods - Basic Sphere, near the top of your list. You will see a blue sphere in your preview window. Press F1 to enter Manual Mode.
- The Rainbow>Linear layer is a single background color. Use the color and Angle sliders to change this color, which will in turn affect the Twilight layer above it - the two layers works together. Use the color sliders on the Twilight layer to further tweak the colors.
- The light focus of the sphere preset is offset. The light focus is determined by the position of the crosshairs in the Preview window. Right click in the Preview to move the crosshairs. To center the cross, right click on the dropdown left of Group at the top of the Manual Mode screen and choose Center Cross.
- Adjust the Intensity and Brightness sliders to change the shadows and lightness of the sphere.
- The Edge layer gives you the size of your sphere and an indication of how the colors and shadows etc. you have chosen will look. You can change the Size, but using the Smooth slider isn't a good idea - for a perfect and smooth circle it's far better to remove the jagged edge in your application.
- Go ahead and adjust the three filters in the layer stack as and how you want to. When you're happy with the result you see, click OK and exit Plugin Galaxy.
- In your graphics application make an anti-aliased circle selection, invert it, and delete/clear to cut away what you don't want of the sphere.
- Tip: in most programs cutting and pasting will center what you paste perfectly. If you've cut your circle off center, use cut and paste to center it again.
Create a new transparent layer above the Sphere. Don't fill this layer with color. Name the Layer "Highlight" in your application's layer palette. Open Plugin Galaxy. Use F2 to access the Presets menu, and click on the preset #Hoods - Highlight.
- You can now simply exit Plugin Galaxy to apply the preset "as is" - tweaking is more easily and quickly done from within your application.
- There are three Edge filter layers in the layer stack. Don't change anything on the bottom layer. If you create a sphere on a different sized image, you can change the size or position of the highlight by moving the crosshairs and adjusting the Size sliders of the top two layers, but it won't be necessary for this tutorial if you've stuck with 200 x 200.
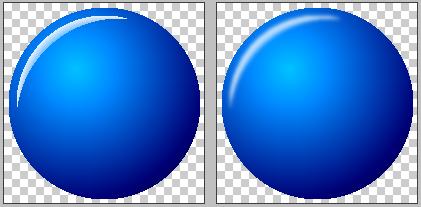
You will now have the rough highlight (above left) on the layer above your sphere.
-
Use your application's Gaussian Blur filter - just enough to remove the jagged edges. Several passes of Blur More is also a nice blurring option to use, as this smoothes the edges without removing color. Use either or both blur filters to get the best result.
-
If the highlight looks a little washed out after blurring, duplicate the highlight layer and adjust the opacity of the duplicated layer to get exactly the result you're after.