
Here you will find a few tips for using FocalBlade more effectively.
Digital cameras usually apply a more or less simple sharpening effect on photos. Sophisticated and time-consuming sharpening algorithms aren't used, because digital cameras manufacturers try to reduce the time between two shots. Side-effects of this simple in-camera sharpening are increased noise and artifacts in the photos, especially in photographs taken under low light conditions.
If you shoot RAW files with your digital camera, there is no sharpening applied to them. But sharpening is usually applied by RAW conversion tools when converting the RAW files to JPG or TIFF files. Unfortunately many of these RAW conversion tools apply a similar bad sharpening as digital cameras do.
FocalBlade offers much more sophisticated sharpening methods. So we generally recommend that you deactivate in-camera sharpening or RAW file sharpening or at least set it to the lowest possible value. That way you will achieve much better results when using FocalBlade later on the photos. Unfortunately many low budget cameras don't allow you to deactivate in-camera sharpening. In such a case you have to live with it or buy a camera that offers such a feature.
Of course if you don't have the time to edit your photos on your computer with FocalBlade, it is sometimes better to use the bad in-camera sharpening on daylight shots than no sharpening at all. However, you will be more happy with night shots if you have in-camera sharpening deactivated, even if you don't plan to sharpen your photos on your computer.
To achieve good results, please always keep the preview zoom at 100%. Only at this setting will you see the sharpening effect as it will be applied to the image. Additionally at settings lower than 100% the activated Evaluate check box may not work perfectly.
It is highly recommended to keep backups of the unsharp versions of your images. So you should save your edited photos with another file name and not overwrite the original files. Another backup possibility is to sharpen a duplicate layer and save the untouched as well as sharpened layer as one file. You may need the unsharpened version in future again if a new version of FocalBlade with better sharpening becomes available or if you want to apply a different sharpening effect for printing on a different device.
Although you should always keep a backup of your original photo, it may be useful to store the original image together with the sharpened image in one file. To do that you can duplicate the original image layer in your graphics application and only apply FocalBlade to the duplicate layer. This also allows you to blend the sharpened layer with the unsharp original to adjust the sharpening intensity.
Additionally you can use
a layer mask to selectively remove the sharpening from some image areas. You
can also add more new layers and sharpen them for different output devices or
papers, but for different output sizes you should better save different files.
The disadvantage of this method is that the size of the saved file gets larger
with each new layer.
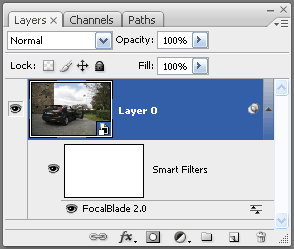
You can also apply FocalBlade as a smart filter in Photoshop CS4/CS5. Before applying FocalBlade you have to convert the background image or a layer into a smart object by choosing Filter > Convert for Smart Filters. By doing so you can always change the FocalBlade settings that were applied to the smart object without having to undo and redo other image processing steps.
Another option is to save the FocalBlade settings as preset files. You can create standard presets for different print sizes and devices, so you don't need to create a new preset files for every new image. The advantage of this method is that you don't need to save big files. You just need to open the original image and apply the same sharpening again by opening the appropriate preset file in FocalBlade. Furthermore, recording actions in Photoshop for different print sizes and devices may be even more convenient.
Sometimes you may want to undo a too extreme sharpening effect in a photo that you received or that has been sharpened with another tool in the past. This can be done manually by using the Soft Blur mode in FocalBlade. If the edges as well as surfaces in the image were oversharpened, you should try to blur the whole image. But don't overdo it with a too strong setting and a too large radius. If only the surface areas were oversharpened, you can keep the edges untouched and only smooth the surface in Selective Blur mode. To do that set the Sharpen sliders to zero and use the Soften slider on the Manual tab sheet.
Although FocalBlade doesn't produce so extreme halos like other sharpening tools, FocalBlade may produce slight halos if you want to apply a very strong sharpening. Here are some tips on how to remove these halos:
After all, even if halos aren't desirable, especially if they are too strong or wide, the mechanism that produces them is essential for the sharpening. Sharpening basically means increasing the contrast between pixels in digital images. So visible halos occur if the contrast adjustment is too extreme. They are more or less a sign that the sharpening applied by FocalBlade is too strong.