Automated Method:
1. Close all images and choose Denoise from the Image > Tasks sub menu or from the Tasks panel, which can be launched from the Window menu.
2. On the appearing Open As Layers file dialog select at least two images (taken with the same camera settings of the same scene) by using the Ctrl or Shift key. Then click the Open button.
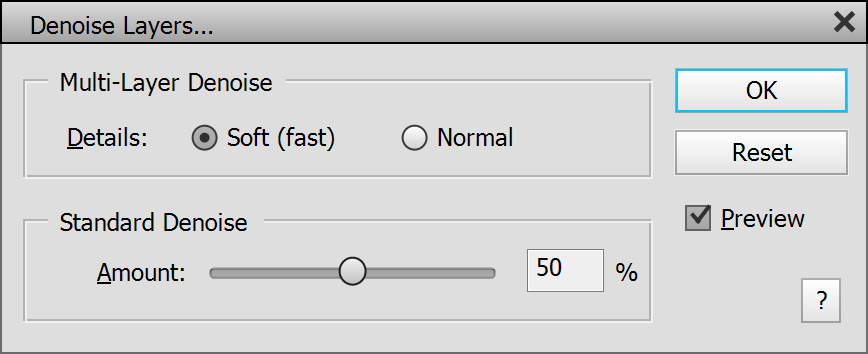
3. When the Denoise Layers dialog appears, adjust its options if necessary. Then click OK.


The left image is a 100%
detail of a photo taken at ISO 6400. For the right image the
Denoise Layers feature was used on five photos taken at ISO 6400.
Manual Method:
1. Choose Open As Layer from the File menu and select at least two images (taken with the same camera settings of the same scene) by using the Ctrl or Shift key. Then click the Open button.
2. If it does not appear automatically, choose Auto Align Layers from the Image menu and click OK.
3. If there are transparent border areas, choose Remove Transparency from the Image menu, activate the "Stacked Images" radio button and click OK to crop them away. To fill these transparent areas with content (in Photoshop Elements 13, Photoshop CS5 and higher) activate the Content-Aware Fill check box before clicking OK. Alternatively use the Crop tool to manually remove them.
4. Choose Denoise Layers from the Image menu, adjust the Denoise options and click OK.
Automated Method:
1. Close all images and choose Depth of Field Increase from the Image > Tasks sub menu or from the Tasks panel, which can be launched from the Window menu.
2. On the appearing Open As Layer dialog select at least two images by using the Ctrl or Shift key. Then click the Open button.
3. Now you will see all images as layers with layer masks that reveal the sharpest parts of each layer.
Manual Method:
1. Choose Open As Layer from the File menu and select at least two images by using the Ctrl or Shift key.
2. If it does not appear automatically, choose Auto Align Layers from the Image menu and click OK.
3. Choose Auto Blend Layers from the Image menu.

4. Select Stack Images from the Blend Method options. If desired, activate the check box for seamless tones and colors. Finally press OK.
5. If there are transparent border areas, choose Remove Transparency from the Image menu, activate the "Stacked Images" radio button and click OK to crop them away. To fill these transparent areas with content (in Photoshop Elements 13, Photoshop CS5 and higher) activate the Content-Aware Fill check box before clicking OK. Alternatively use the Crop tool to manually remove them.
Automated Method:
1. Close all images and choose HDR from the Image > Tasks sub menu or from theTasks panel, which can be launched from the Window menu.
2. On the appearing Open As Layer dialog select at least one raw file but maximally three files (taken with the different exposure settings of the same scene) by using the Ctrl or Shift key. Then click the Open button.
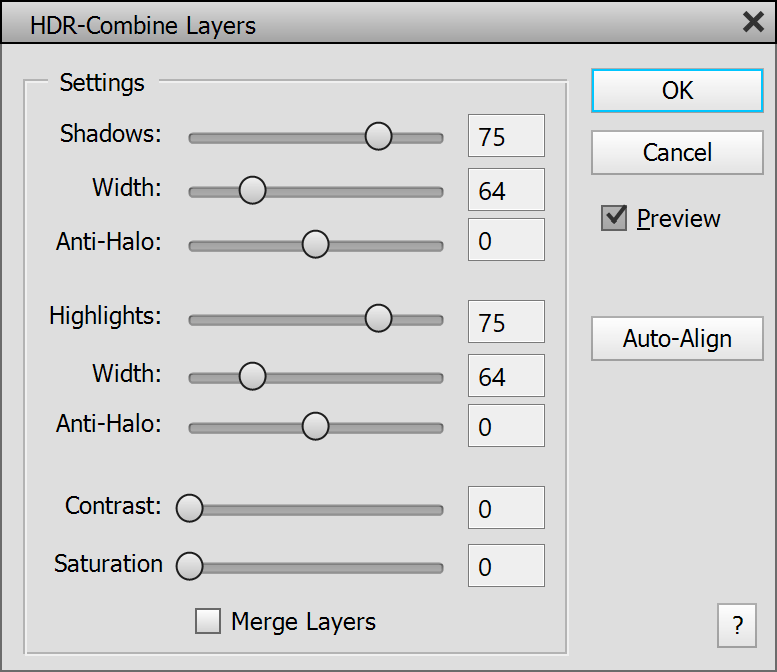
3. When the HDR-Combine Layers dialog appears adjust its settings. Then click OK.
Manual Method:
1. Choose Open As Layer from the File menu and select at least one raw file but maximally three files by using the Ctrl or Shift key. Then click the Open button.
2. If it does not appear automatically, choose Auto Align Layers from the Image menu and click OK.
3. If there are transparent border areas, choose Remove Transparency from the Image menu, activate the "Stacked Images" radio button and click OK to crop them away. To fill these transparent areas with content (in Photoshop Elements 13, Photoshop CS5 and higher) activate the Content-Aware Fill check box before clicking OK. Alternatively use the Crop tool to manually remove them.
4. Choose HDR-Combine Layers from the Image menu, adjust the settings for the best result and click OK.
Automated Method:
1. Close all images and choose Light Trail from the Image > Tasks sub menu or from the Tasks panel, which can be launched from the Window menu.
2. On the appearing Open As Layer dialog select at least two photos (taken of the different scenes) by using the Ctrl or Shift key. Then click the Open button.
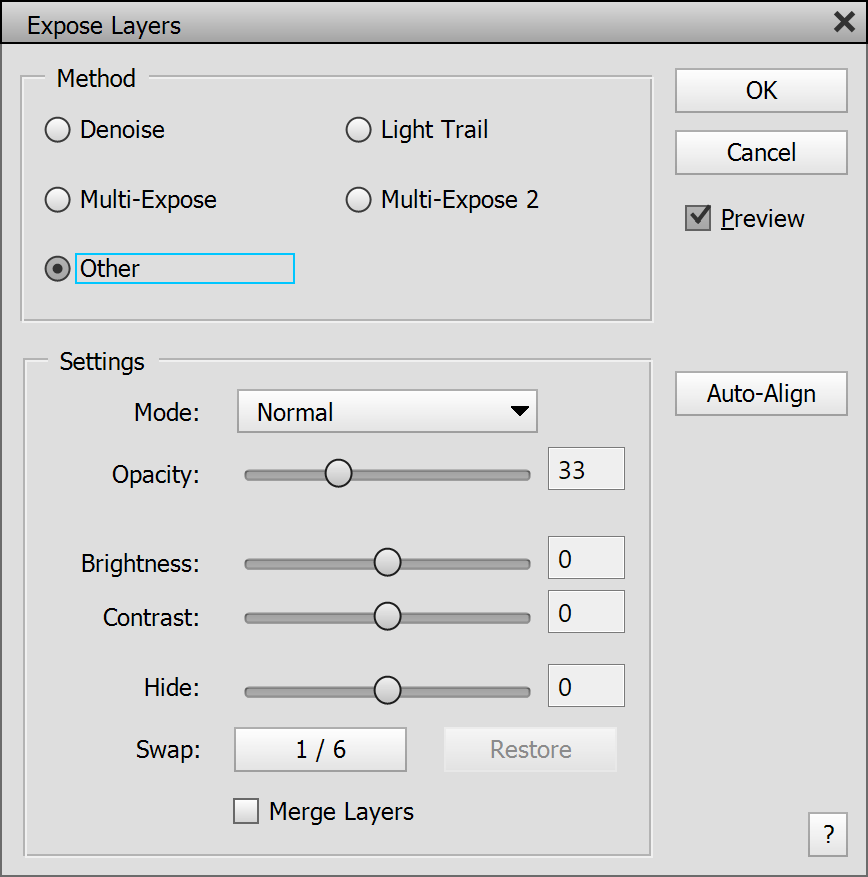
3. When the Auto-Expose Layers dialog appears adjust its Brightness and Contrast sliders and try the Hide slider for excluding some photos. Then click OK.
Manual Method:
1. Choose Open As Layer from the File menu and select at least two photos of light trails by using the Ctrl or Shift key. Then click the Open button.

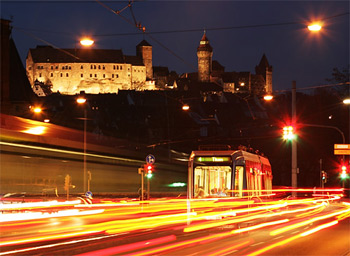
The left
image is one of three light trail photos taken with a tripod. The right result
was produced by automatically aligning
and cropping all three photos and applying LayerShop's Auto-Exposure feature
with the Light Trail option activated.
2. If
it does not appear automatically, choose Auto Align Layers from
the Image menu and click OK.
3. If there are transparent border areas, choose Remove Transparency from the Image menu, activate the "Stacked Images" radio button and click OK to crop them away. To fill these transparent areas with content (in Photoshop Elements 13, Photoshop CS5 and higher) activate the Content-Aware Fill check box before clicking OK. Alternatively use the Crop tool to manually remove them.
4. Choose Auto-Expose Layers from the Image menu, select the Light Trail method, adjust the Brightness and Contrast sliders, try the Layers slider for excluding some photos and click OK.
Automated Method:
1. Close all images and choose Manual Composition from the Image > Tasks sub menu or from the Tasks panel, which can be launched from the Window menu.
2. On the appearing Open As Layer dialog select at least two images by using the Ctrl or Shift key. Then click the Open button.
3. Now you will see all images as layers each with a layer mask except the bottom layer. Use the brush tool for making certain image areas of a layer visible or invisible. This way you can combine the best parts of each photo.
Manual Method:
1. Choose Open As Layer from the File menu and select at least two images by using the Ctrl or Shift key.
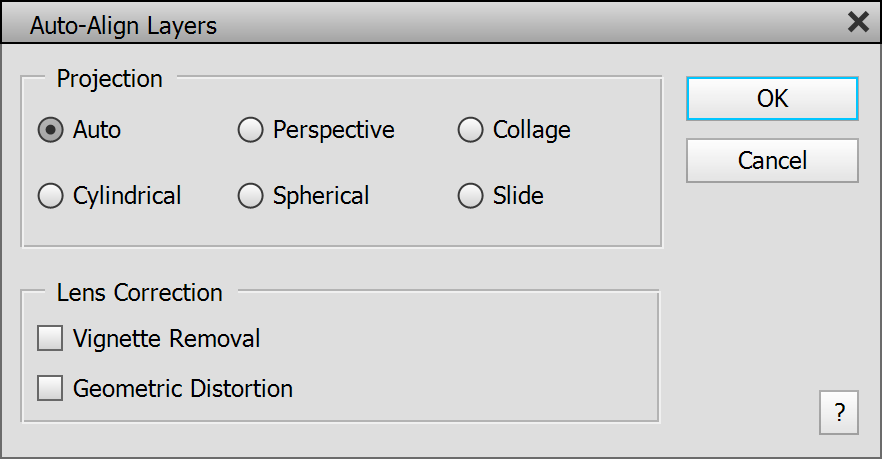
2. If it does not appear automatically, choose Auto Align Layers from the Image menu and click OK.
![]()
3. If there are transparent border areas, choose Remove Transparency from the Image menu, activate the "Stacked Images" radio button and click OK. Alternatively use the Crop tool to manually remove them.
4. Create a layer mask for each layer except the bottom one and use the brush tool for making certain image areas of a layer visible or invisible. This way you can combine the best parts of each photo.
Automated Method:
1. Close all images and choose Multiple Exposure from the Image > Tasks sub menu or from the Tasks panel, which can be launched from the Window menu.
2. On the appearing Open As Layer dialog select at least two photos (taken of the different scenes) by using the Ctrl or Shift key. Then click the Open button.
3. When the Auto-Expose Layers dialog appears click the Swap button multiple times for effect variations and try the "Multi-Expose 2" option. Adjust the Brightness and Contrast sliders if necessary. Then click OK.
Manual Method:
1. Choose Open As Layer from the File menu and select at least two photos (taken of the different scenes) by using the Ctrl or Shift key. Then click the Open button.
2. Choose Auto-Expose Layers from the Image menu, select the Multi-Expose method. Click the Swap button multiple times for effect variations and try the "Multi-Expose 2" option. Adjust the Brightness and Contrast sliders if necessary. Then click OK.
Automated Method:
1. Close all images and choose Panorama from the Image > Tasks sub menu or from the Tasks panel, which can be launched from the Window menu.
2. On the appearing Open As Layer dialog select at least two images by using the Ctrl or Shift key. Then click the Open button.
3. On the Remove Transparency dialog you can decide about the transparent areas of the panorama. To to keep them click Cancel. To crop them away deactivate the Content-Aware Fill check box and click OK. To fill them with content (in Photoshop Elements 13, Photoshop CS5 and higher) activate the Content-Aware Fill check box and click OK.
4. Now you will see all images as layers stitched as panorama.
Manual Method:
1. Choose Open As Layer from the File menu and select at least two images by using the Ctrl or Shift key.
2. If it does not appear automatically, choose Auto Align Layers from the Image menu. For normal panoramas best choose the Cylindrical option of the Projection group, because the Auto option is sometimes a bit unreliable. The other options position and distort the panorama images differently. Click OK.
3. Choose Auto Blend Layers from the Image menu.
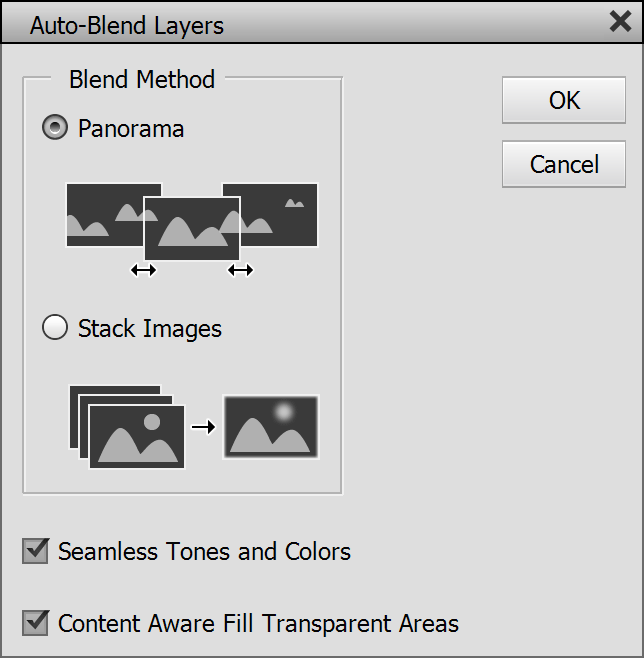
4. Select the Panorama radio button from the Blend Method options and activate the check box for seamless tones and colors. Finally press OK.
5. If there are transparent border areas, choose Remove Transparency from the Image menu and activate the Panorama option. To crop the transparent areas away deactivate the Content-Aware Fill check box and click OK. To fill them with content (in Photoshop Elements 13, Photoshop CS5 and higher) activate the Content-Aware Fill check box and click OK.
Automated Method:
1. Close all images and choose Remove Moving Objects from the Image > Tasks sub menu or from the Tasks panel, which can be launched from the Window menu.
2. On the appearing Open As Layer dialog select at least three images by using the Ctrl or Shift key. Make sure to choose an uneven number of photos for better results. Then click the Open button.
3. If you still see parts or faded versions of the objects, please continue with the "Further Object Removal" instructions below.
Manual Method:
1. Choose Open As Layer from the File menu and select at least three images by using the Ctrl or Shift key.
2. If it does not appear automatically, choose Auto Align Layers from the Image menu and click OK
3. If there are transparent border areas, choose Remove Transparency from the Image menu, activate the "Stacked Images" radio button and click OK to crop them away. To fill these transparent areas with content (in Photoshop Elements 13, Photoshop CS5 and higher) activate the Content-Aware Fill check box before clicking OK. Alternatively use the Crop tool to manually remove them.
4. Choose Remove Moving Objects from the Image menu.
Further
Object Removal:
1. If you still see parts or faded versions of the objects that you wanted to remove, please create a selection around them.
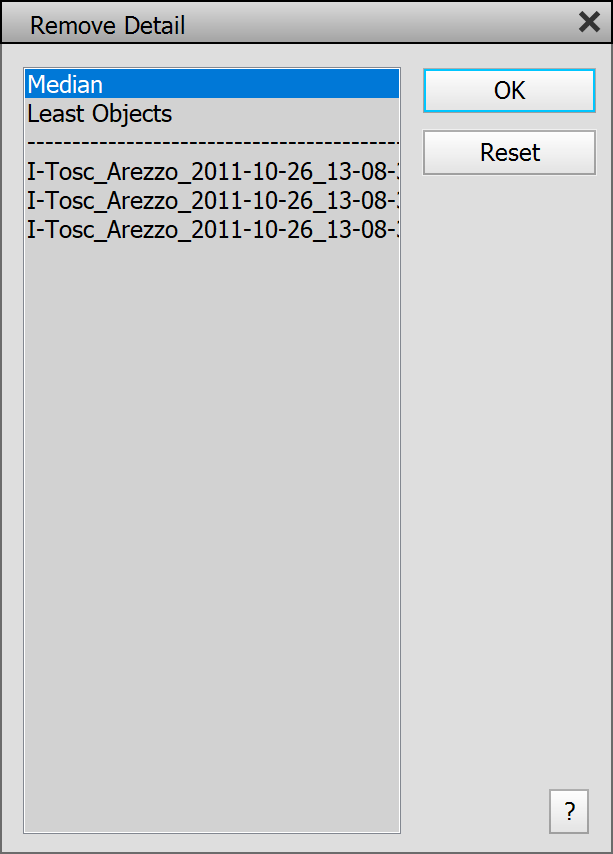
2. Choose Remove Detail from the Image menu and select the items in the list until the object(s) vanish. Then click OK.
Automated Method:
1. Close all images and choose Increase Resolution from the Image > Tasks sub menu or from the Tasks panel, which can be launched from the Window menu.
2. On the appearing Open As Layer dialog select at least two images by using the Ctrl or Shift key. Then click the Open button.
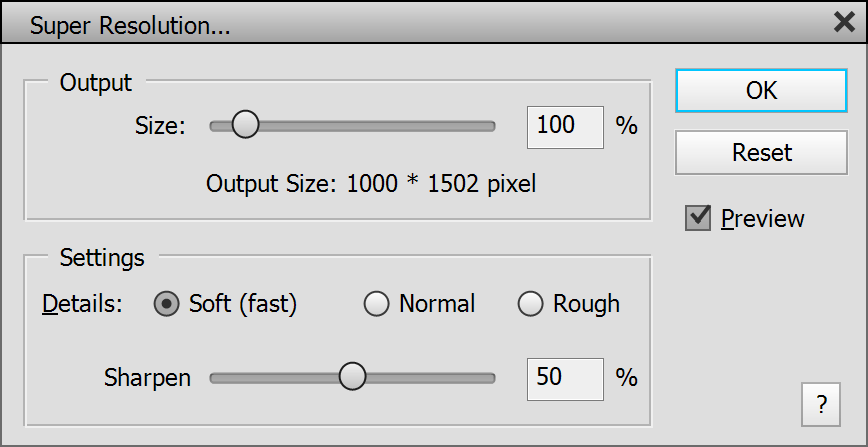
3. On the Super Resolution dialog choose an output size in percent and adjust the detail and sharpen settings as needed.
Manual Method:
1. Choose Open As Layer from the File menu and select at least two images by using the Ctrl or Shift key.
2. If it does not appear automatically, choose Auto Align Layers from the Image menu and click OK.
3. If there are transparent border areas, choose Remove Transparency from the Image menu, activate the "Stacked Images" radio button and click OK to crop them away. To fill these transparent areas with content (in Photoshop Elements 13, Photoshop CS5 and higher) activate the Content-Aware Fill check box before clicking OK. Alternatively use the Crop tool to manually remove them.
4. Choose Super Resolution from the Image menu and choose an output size in percent and adjust the detail and sharpen settings as needed.
Automated Method:
1. Close all images and choose Fix Underexposure from the Image > Tasks sub menu or from the Tasks panel, which can be launched from the Window menu.
2. On the appearing Open As Layer dialog select at least two images by using the Ctrl or Shift key. Then click the Open button.
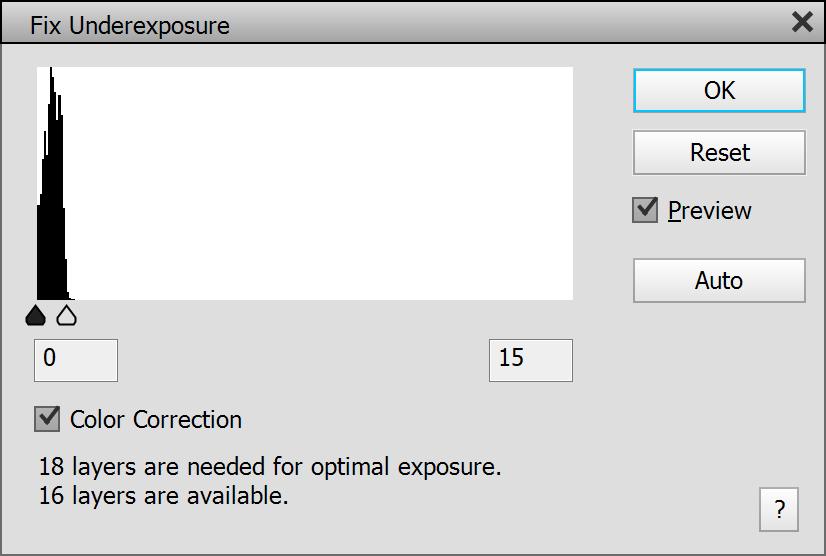
3. On the Fix Underexposure dialog you can use the slider below the histogram to adjust the exposure intensity in case you do not like the automatic setting. Activate the Color Correction check box to fix a color cast. Then click OK.
Manual Method:
1. Choose Open As Layer from the File menu and select at least two images by using the Ctrl or Shift key.
2. If it does not appear automatically, choose Auto Align Layers from the Image menu and click OK.
3. If there are transparent border areas, choose Remove Transparency from the Image menu, activate the "Stacked Images" radio button and click OK to crop them away. To fill these transparent areas with content (in Photoshop Elements 13, Photoshop CS5 and higher) activate the Content-Aware Fill check box before clicking OK. Alternatively use the Crop tool to manually remove them.
4. Choose Fix Underexposure from the Image menu. You can use the slider below the histogram to adjust the exposure intensity in case you do not like the automatic setting. Activate the Color Correction check box to fix a color cast. Then click OK.