LayerShop offers five new layer effects, 100 new effect and blending options for Photoshop Elements. They can be accessed from two new menu items on the Layer > Layer Style sub menu.
Supported
by Photoshop Elements 11 and higher,
already available in Photoshop
Requirements: An 8-bit
image has to be opened. Some effects need a layer mask or transparent areas.
Added
in LayerShop 1.0
LayerShop replaces the simplistic Style Settings dialog of Photoshop Elements with a dialog similar to the Layer Styles dialog of Photoshop. You can access it on the Layer Style sub menu of the Layer menu, e.g. by clicking the Style Settings menu item, or with the new fx icon on the Layers panel. The three main parts of the Style Settings dialog (Styles, Blending Options and Layer Effects) are discussed below.
The Classic button in the right bottom corner lets you switch to the original Style Settings dialog of Photoshop Elements.
If you click on the Styles item in the list box at the left hand side, a styles list box will be displayed. This Styles control sheet is similar to the Effects > Styles panel of Photoshop Elements, but additionally provides options for creating new styles, organizing your own style collection and saving it as a .asl file.
Styles are basically presets that store the settings of one or more layer effects (and sometimes blending options). To apply one of the styles simply click on it in the styles list box.
You can replace the current styles or add more styles with the help of the icon at the right hand side of the styles list box. Clicking this icon displays a menu with various options. At the bottom of the menu you can see the names of style files, which are already included with Photoshop Elements. Clicking on one of these items opens the appropriate style file. But you can also open other .asl files with the Load Styles menu item. In both cases you will be asked if you want to replace the current styles with the new ones. To keep the existing styles and add the new ones simple click the No button.
If you use the Replace Styles menu item, you can also choose an .asl file with new styles, but you will not be asked if you want to replace the styles in the list. Instead the old styles will be automatically removed and only the new styles will be shown in the styles list. To fill the list with the default styles again, use the Reset Styles menu item. For saving all current styles in a single .asl file, please choose the Save Styles menu item.
You can rename an existing style by selecting it in the list and choosing the Rename Style menu item. You can also remove a style with the Delete Style menu item.
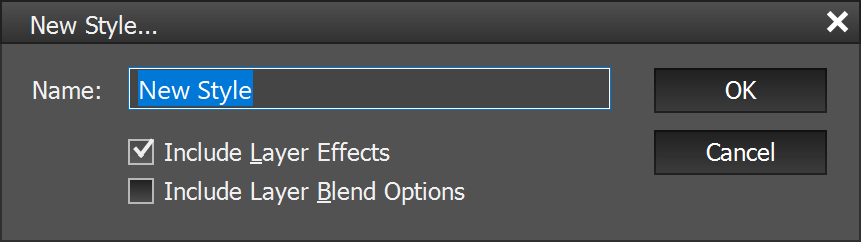
Finally, the New Style menu item lets you create a new style from the currently active layer effects. The New Style button has the same functionality. On the New Style dialog you can decide if you want to store only the settings of the layer effects or also include the settings of the blending options in the preset.
Supported
by Photoshop Elements 11 and higher,
already available in Photoshop
Requirements: An 8-bit
image has to be opened.
Added in LayerShop 1.0
The Style Settings dialog provides general blending as well as advanced blending options. To display them click on the Blending Options item in the list box on the left hand side.
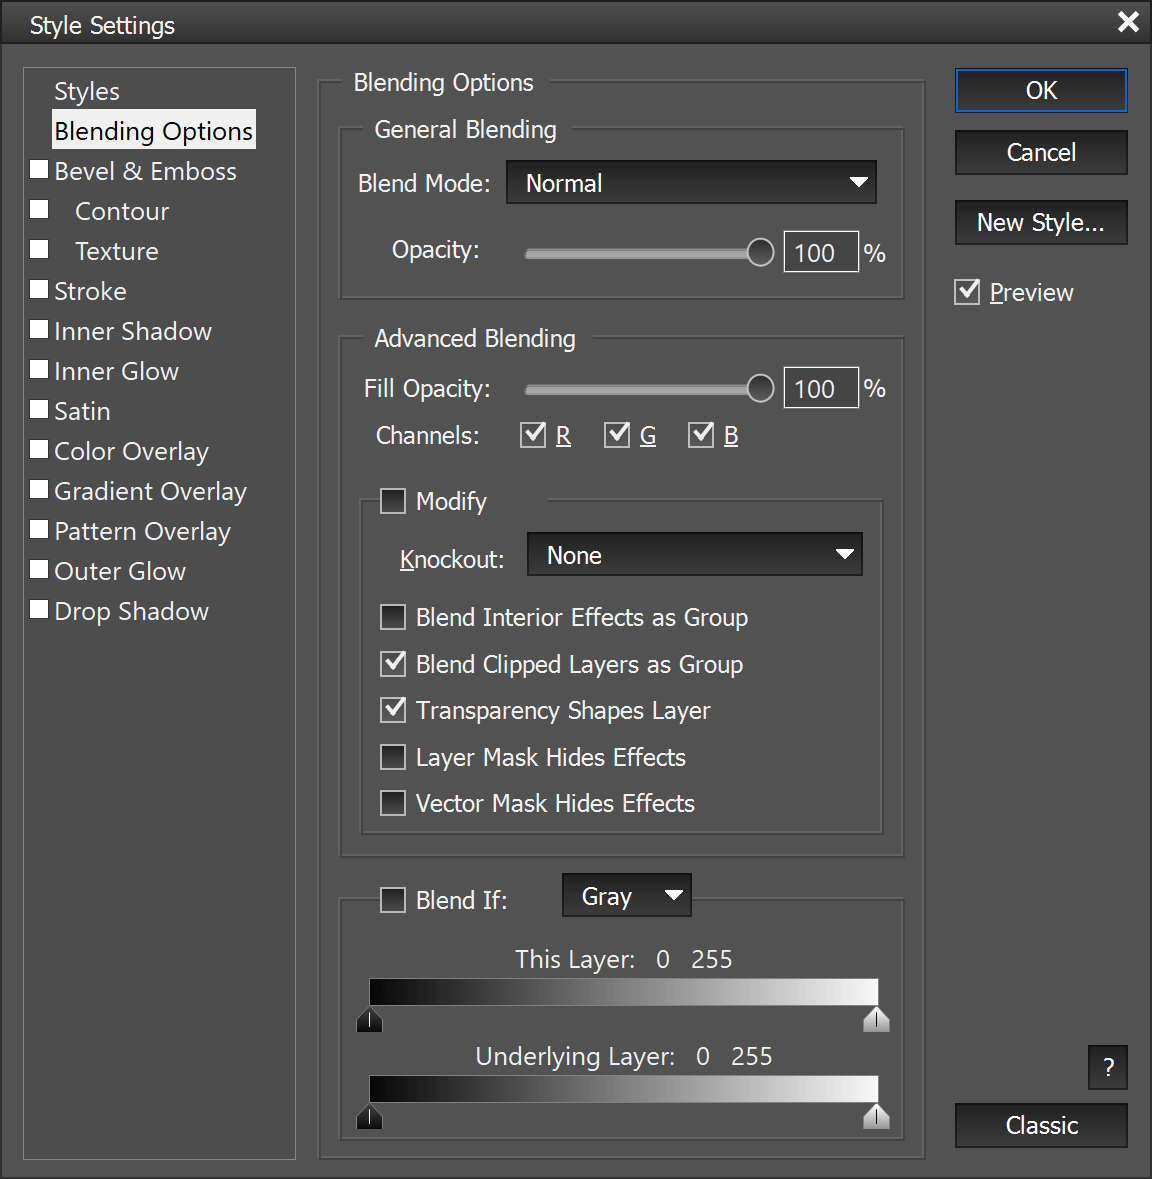
The general blending controls (blend mode and opacity) are identical to those one the Layers panel, so you should be familiar with them. The advanced blending options on the other hand provide very special options for influencing the blending properties of the layer.
The Fill Opacity slider works like the Opacity slider, but keeps the layer effects untouched. So it only changes the opacity of the image content of the layer. The three Channels check boxes let you deactivate the red, green and/or blue channels of the current layer.
The Knockout feature makes the current layer "punch through" to reveal content from other layers. So the layer content itself will be used similarly to a layer mask that affects one or multiple layers. The Shallow option "knocks through" to the next layer below or the base layer of a clipping mask group. The Deep option punches through to the background layer or without a background layer it knocks out to transparency.
The Blend Interior
Effects As Group check box applies the current blend mode to following
layer effects: Inner Glow, Satin, Color Overlay and Gradient Overlay. The Blend
Clipped Layers As Group option applies the blend mode to all layers
in a clipping mask group. Deactivating this option retains the original blend
mode and appearance of each layer in the group. An activated Transparency
Shapes Layers check box restricts the knockout and layer effects to
non-transparent areas of the layer. Otherwise they are applied throughout the
whole layer, which is usually not what you want. The Layer Mask Hides
Effects option applies the layer mask to the layer effects too. Similarly,
the Vector Mask Hides Effects option makes sure that the layer
effects only show up in the areas that are defined as opaque by the vector mask.
 |
 |
 |
 |
The clouds from the bottom left image were blended with the top left image using the settings in the bottom right screenshot. The top right image shows the result. Manually masking all of the fine branches would have taken 1-2 hours whereas the Blend If feature made it possible in less than a minute. |
|
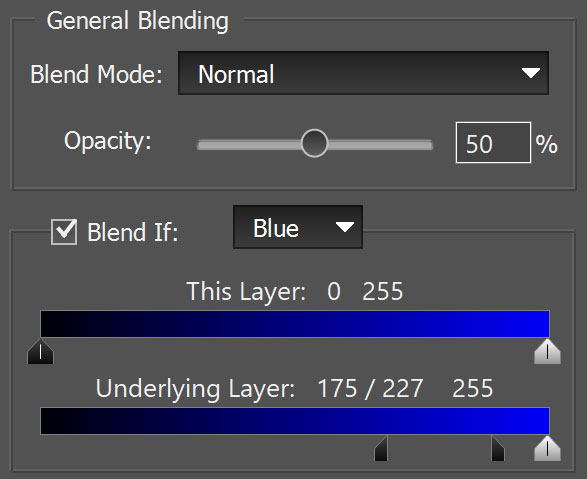
The Blend If feature
is a very powerful tool for masking certain image areas. It lets
you make certain brightness and color ranges of the current layer transparent
(by using the This Layer slider). And it also enables you to blend certain brightness
and color ranges of the layer below into the current layer (by using the Underlying
Layer slider). If you perform an adjustment, the Blend If check box
will be automatically activated. To disable the Blend If effects, simply
deactivate this check box. The Blend If combo box lets you
choose between Gray, Red, Green and Blue options. These options are not exclusive
- on the contrary you can e.g. define a gray range as well as a red range, green
range and blue range.
The two Blend If sliders offer two knobs each. One for the darker tones and one for the bright tones. By holding down the Alt key and dragging one of the knob halves you can split each knob in two, which has the great side-effect that the tonal values between the two halves produce a smooth transition. We recommend that you always do that to avoid harsh edges. For example, if you want to make the brightest image areas of the current layer transparent, choose the Gray combo box option, hold down the Alt key and drag the left halve of the gray slider knob of the "This Layer" slider to the left. Additionally if you want to blend in the dark red areas of the underlying layer into the current layer, choose the Red combo box option, hold down the Alt key and drag the right halve of the black slider knob of the Underlying Layer slider to the right.
Sometimes you have to combine the Blend If feature with a layer mask to remove a few blending imperfections. Still it saves you a lot of manual masking work.
Please note: It is not possible for a plugin to access the settings of the Modify and Blend If groups from Photoshop Elements. So the last used settings are kept, but they are not automatically used when the Style Settings dialog is displayed again. Only when the Modify and Blend If check boxes are activated, these settings are applied. When you change one of the settings, the appropriate checkbox is automatically activated. So if you plan to use the Modify and Blend If settings on more than one layer, best edit these settings in one pass, so that you do not need to edit them later again.
Supported
by Photoshop Elements 11 and higher,
already available in Photoshop
Requirements: An 8-bit
image has to be opened.
Added
in LayerShop 1.0
Photoshop Elements offers by default a total of 20 effect options and the following five layer effects: Drop Shadow, Glow (Inner & Outer), Bevel and Stroke. LayerShop adds 100 new effect options (including gradient, pattern and contour effects) and five new layer effects: Inner Shadow, Satin, Color Overlay, Gradient Overlay and Pattern Overlay. Layer effects work best on layers with transparent areas or a layer mask, e.g. text layers, layers with design elements or layers with cut out image areas.
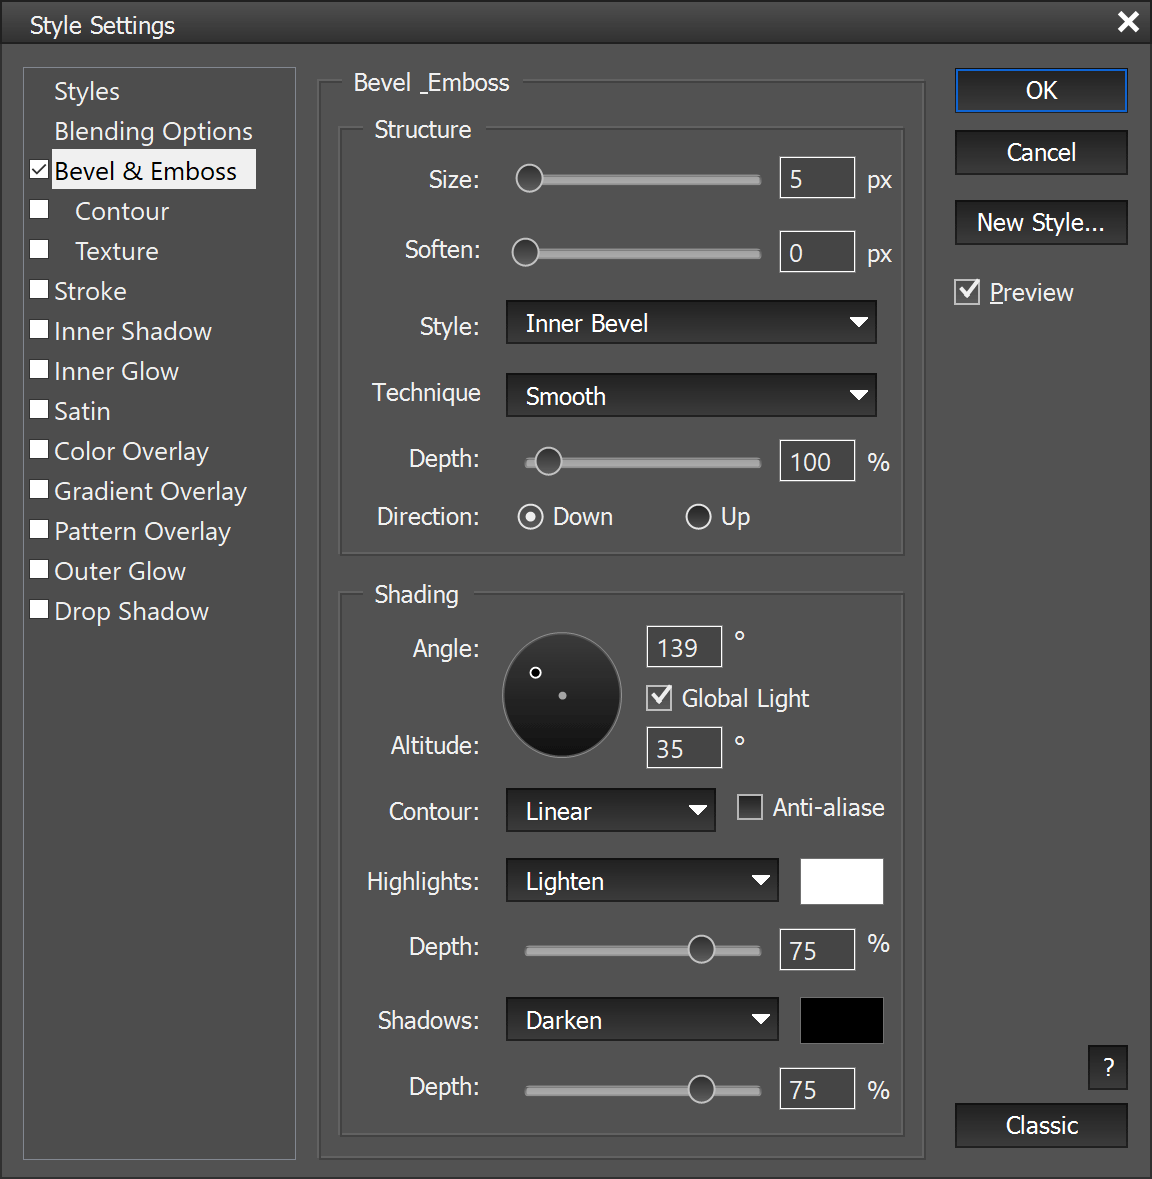
By clicking on one of the twelve items on the left hand side you display the options of a layer effect and automatically activate it. To disable a layer effect again, deactivate its check box. Unlike the other layer effects the Bevel & Emboss layer effects offer two sub pages with controls called Contour and Texture, because not all options fit on one page.
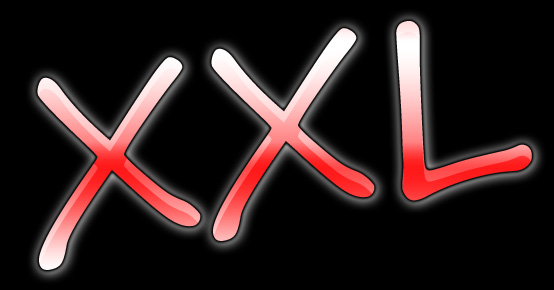
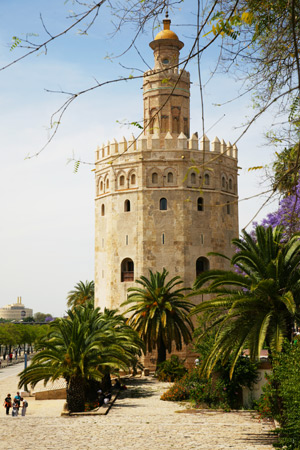
This image was created with the following layer effects: Drop Shadow (white
shadow), Outer Glow
(black letter outline), Inner Shadow (letter gloss effect) and Gradient Overlay
(white/red gradient).
It is best if you explore all of these effects options by trying them out. That
will make their function more clear than any explanation would be able to. Only
certain control elements will be discussed here to give you a kick start.
The Angle Control

The angle control lets you select the light angle of the Stroke, Inner Shadow, Satin, Gradient Overlay and Drop Shadow effects. Simply click somewhere within the circle to change the angle or enter the angle directly in the text box.
The Angle/Altitude Control

This control is only available under Bevel & Emboss. It lets you select the angle as well as the altitude of the bevel effect. The invisible line between the center dot and the small white circle defines the angle. On the other hand the distance between the center dot and the small white circle defines the altitude of the bevel effect. Click somewhere within the circle to change both angle and altitude or enter them in the appropriate text boxes.
The Global Light Check Box
The Global Light check box lets three effects (Bevel & Emboss, Inner Shadow, Drop Shadow) share the same light angle. So if the Global Light check box is activated and you change the angle, all other effects that have Global Light activated will automatically use the same angle value. If you deactivate the Global Light check box for an effect, this effect can use its individual angle value.
The Color Box
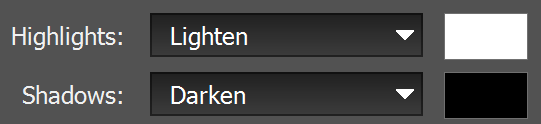
Almost all effects offer a color box for selecting a certain color that is applied with the effect. Click on the color box to display a color dialog for choosing another color. Most of these color boxes are at the right hand side of Blend Mode combo boxes. In such a case the blend mode is used to apply the color. If you selected a bright color, e.g. white, it is recommended to select Screen as the blend mode. If you selected a dark color, e.g. black, you get the best results with Multiply blend mode.
The Pattern Combo Box
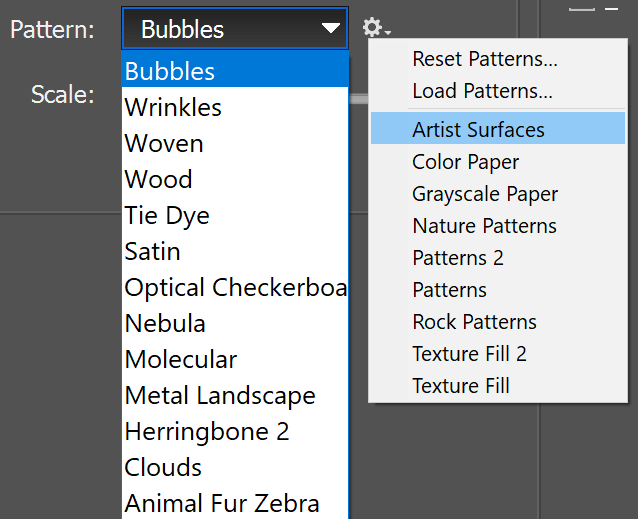
Some effects let you choose a pattern for adding a texture look. The currently loaded patterns are displayed on the Pattern combo box. If you want to use another pattern, please click on the menu icon at the right hand side of the combo box. This displays a menu with options for loading a pattern file via a file dialog or for choosing pattern files that are delivered with Photoshop Elements. After loading a new pattern file, its patterns are displayed in the combo box.
You can sample your own pattern from an image by creating a selection and choosing Edit > Define Pattern. This pattern will then be available on the Pattern combo boxes when you open the Style Settings dialog again.
The Gradient Control & Gradient Editor
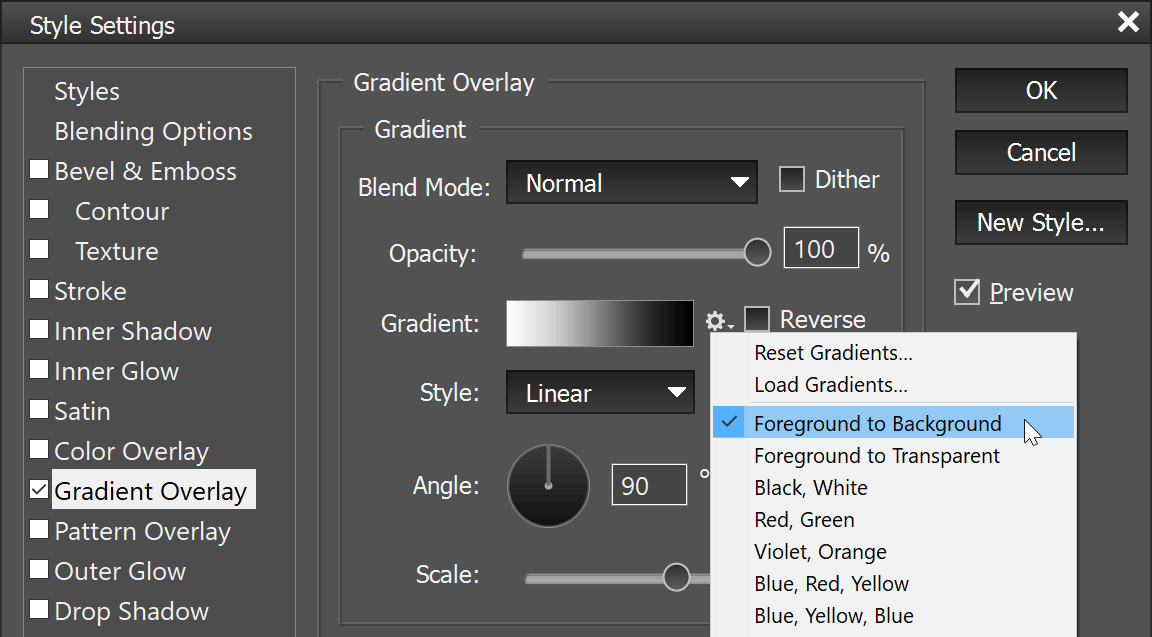
Four effects (Stroke, Inner Glow, Gradient Overlay and Outer Glow) let you choose a gradient for adding a gradient look. The currently used gradient is displayed in a rectangular box. If you want to use another gradient, please click on the menu icon at the right hand side of the gradient box. This displays a menu with options for loading a gradient file via a file dialog or choosing gradient files that are delivered with Photoshop Elements. After loading a new gradient file, its gradients are displayed on the same menu and can be chosen.
If you click on the gradient box, the Gradient Editor window shows up. Here you can choose other gradients, edit them and even create totally new gradients of your own.
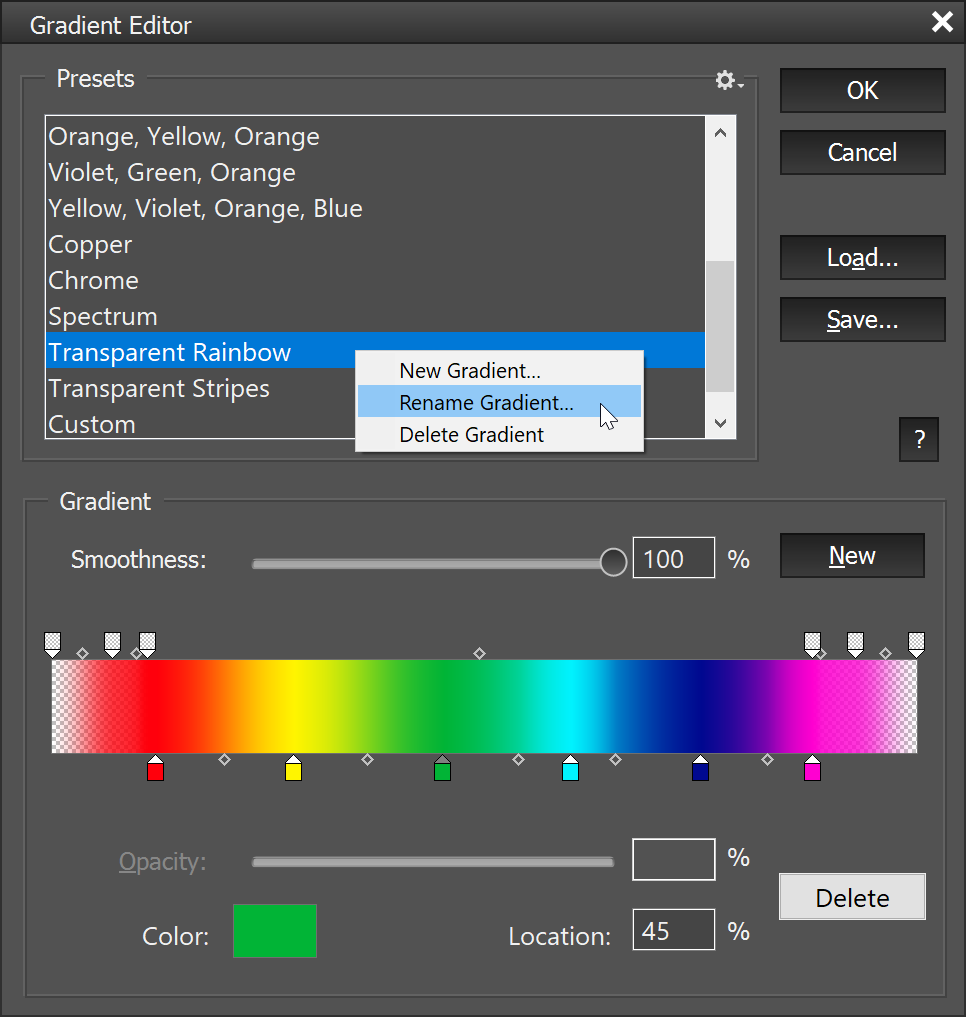
The list box at the top displays the currently available gradients just like the menu in the previous dialog. Click on one of the list items to apply the gradient and to display it in the big gradient bar below for editing. The menu icon above the list box offers options for loading gradient files. Alternatively you can also click the Load button. The Save button on the other hand saves the current gradients to a new file. Right clicking on the list box displays a context menu for creating a new gradient (see the New button below) as well as renaming and delete a gradient.
The bottom half of the Gradient Editor window contains controls for editing the currently selected gradient and for creating a totally new gradient. The Smoothness slider controls the softness of the colors and transparency of the gradient. A value of 0% produces a hard gradient whereas a value of 100% results in a soft one.

The New button adds the current gradient as a new gradient. Clicking it makes a new dialog for entering the new gradient's name appear. After clicking OK the new gradient appears in the list box at the top.
The big gradient bar displays the gradient and offers controls for editing its transparency and color values with the help of handles. The transparency handles are located above and the color handles are located below the gradient bar. To select a handle left click or right click on it. To change its position simply drag it. If you drag a handle away from the gradient bar, it will vanish. It will be deleted once you release the mouse button. If you keep the mouse button pressed down and move the mouse back towards the gradient bar, the handle will appear again. To create a new handle click in a blank space above or below the gradient bar. The rhomb-shaped handles between the normal handles define the gradient midpoint. If you move such a midpoint handle, the gradient will be stretched on one side and compressed on the other.
If a handle is selected, its values are displayed in the controls below the gradient bar. All three types of handles have a location property, but transparency handles have opacity properties and color handles have color properties. The location value can be entered in the text box, but usually it is more practical to drag the handle to change it. To edit a color click on the color box, which displays a color dialog. To edit the opacity use the Opacity slider. The Delete button deletes the currently selected handle. Dragging the handle away from the gradient bar has the same effect. Midpoint handles cannot be deleted.