ElementsXXL adds four menu items to the Edit Menu of Photoshop Elements, including an item for changing the ElementsXXL preferences.
Requirements: An image adjustment or effect should be applied before using it.
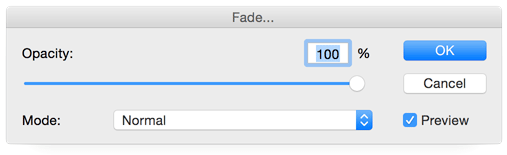
The Fade command lets you adjust the opacity and blend mode of the last operation, respectively the last item shown in the History panel. So make sure that the last history item is an operation that changes the image pixels, otherwise Fade will have no effect.
Fade saves you the work of undoing the last image editing step, creating a new layer, reapplying the image editing, adjusting the opacity and blend mode of the new layer and merging the new layer with the old one.
Requirements: A text layer has to be selected in the Layer panel.
The Spell Check menu item checks the spelling of the currently selected layer or that of all layers if the Check All Layers check box is activated.
This feature does not work with all Photoshop Element versions and not all systems. Sometimes only a "Spell Check Complete" message appears. So far it is unclear why it works on some computers and not on others, but it may help if Photoshop is also installed on your computer.
Requirements: A text layer has to be selected in the Layer panel.
WIth the Find and Replace Text item you can find certain letters or words in a text layer and exchange them by others. It works similar as you know it from text editing programs.
In the Find What text box above you insert the text that you want to exchange. In the Change To text box below you insert the text that is to replace the search term of the Find What text box. The "Find Next" button selects the first found word. Clicking it again highlights the next occurrence. The Change button replaces the search term accordingly. Change All replaces all occurrences of the search terms. Change/Find executes both actions, changing and finding, but requires to click Find Next at first. Done exits the dialog.
If the Search All Layers check box is activated, all text layers are searched. A deactivated Forward check box searches the text backwards. An activated Case Sensitive check box makes sure that the case of the letter of the search term is not ignored. Whole Word Only treats the search term like a single word and not as multiple ones. For example, the term "of the" would not find separate "of" and "the" words but only "of the" text blocks.
Requirements: None
If you click on this menu item on the Preferences sub menu, a dialogue window is opened that lets you change the settings of Elements XXL. You can switch between different preferences groups by using the list on the right or by clicking the Prev and Next buttons. To set all options to the original default values click the Reset button. Press OK to apply the changes on this dialog or Cancel to discard them.
ElementsXXL Page
The Deactivate ElementsXXL check box lets you deactivate ElementsXXL without installing it. You have to restart Photoshop Elements to make the deactivation work. To reactivate ElementsXXL again please choose File > Automation Tools > ElementsXXL from the menu. This option works in all versions of Photoshop Elements.
When running ElementsXXL for the first time, all menu items, icons and buttons of ElementsXXL have a blue background, so that you immediately see which features were added. To retain this highlighting activate the Colorize Icons & Menu Items check box. Once you know ElementsXXL well enough, you can deactivate it again.
General Page
If the Auto-Update Open Documents check box is activated, Photoshop Elements constantly checks whether the currently opened documents were updated on the hard drive or on a network location. If the file of one of the documents was modified by another software or the operating system, the file will automatically be loaded and appears as a new item in the History panel. So even if the file is automatically updated, you do not lose your current editing work in Photoshop, because you can undo the automatic update if you want.
The Large Font Preview check box displays the font samples on the font combo box larger than usual. This makes it much easier to identify the look of the fonts.
Here you can see the Tool Options panel with the large font preview on the left and the original, smaller font size on the right:

The Interpolation check
box lets you adjust the interpolation that is used for the move tool and
functions from the Image menu, e.g. Free Rotate Layer,
Free Transform, Skew, Distort, Perspective and Scale.
History
Page
The Auto-Create First Snapshot check box is activated by default and displays a snapshot item in the History panel when an image is opened. Deactivate it to avoid the snapshot item.
When you undo steps and apply a new operation, the undone steps vanish from the History panel. By activating the Non-Linear History check box you avoid that they vanish when you apply a new operation. Now you can still switch back to these unused history states.
The Log History to Metadata check box adds all steps of the History panel to the metadata of the image, which is saved together with the image data to a file. Now you can see which editing steps where applied to an image by using the File > File Info menu command and switching to the History tab sheet on the appearing window.
Key Shortcuts
Page

The Deactivate Key Shortcuts check box deactivates (and activates again) the key shortcuts of ElementsXXL. All available key shortcuts are shown in the list below. This feature works in all versions of Photoshop Elements.