1. Open an RGB image in Photoshop (Elements).
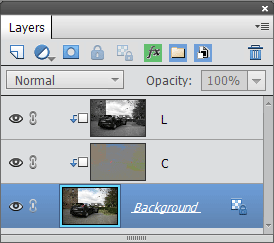
2. Choose Image > Split Layer > Luminosity & Color. Now you see additional L and C layers in the Layers panel.
3. Zoom to 100% to be able to adjust the sharpening and color reduction effect more effectively.
3. Click on the L layer and apply the Unsharp Mask or Adjust Sharpness filter from the Enhance menu.
4. Click on the C layer and apply the Surface Blur filter from the Filter > Blur sub menu. Raise the Radius and Threshold value until the color noise vanishes.
5. To combine the layers again, select all three layers and choose Layer > Merge Down.
1. Open an RGB image in Photoshop (Elements).

2. Choose Image > Split Layer > Frequency. Keep the setting on the appearing dialog. Now you see additional High and Low layers in the Layers panel. The High layer contains the skin texture whereas the Low channel holds the global skin gradation.
3. Select the Low layer to remove larger highlight or shadow areas from the skin or generally reduce the color contrast of various skin areas. Create a feathered selection on a skin area and apply the Gaussian Blur filter to it. The radius of the Gaussian Blur should be almost twice as large as the radius that was used for frequency separation. So that would be around 24 to 32 pixels. Repeat this process on different areas of the face until you are satisfied.
4. To remove skin imperfections select the Low layer and use the stamp tool or healing brush on it. Make sure that the All Layers check box is deactivated in the Tool Options panel. For a more extreme make-up effect you can also paint with mid gray colored brush that has opacity of 10 to 50%.
5. To combine the layers again, select all three layers and choose Layer > Merge Down.
1. Open an RGB image in Photoshop (Elements).
2. If there is no background layer, run Layer > Flatten Image. If the image is 16-bit, choose Image > Mode > 8 Bits/Channel.
3. Add one or more adjustment layers until you are satisfied with the effect.
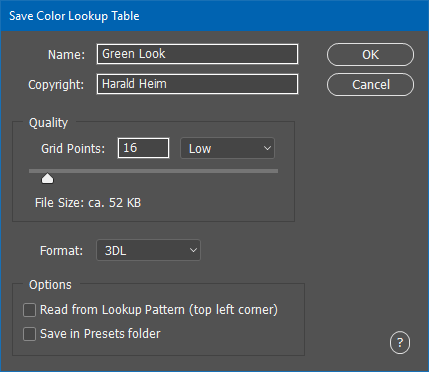
4. Choose File > Save > Color Lookup Table. Enter the name of the effect and your name at the top of the dialog. Decide on the number of grid points and the format you want the lookup file to have. We recommend 16 and 3DL settings for small files and 32 and CUBE or CSP settings for slightly better quality but larger files.
5. Make sure that the Read from Lookup Pattern check box is deactivated. If you activate the Save in Preset folder check box, the lookup file will appear as a preset on the Color Lookup dialog, but only after you restarted Photoshop (Elements).
6. Press the OK button. If you did not activate the Save in Preset folder check box, a file dialog will appear for saving the lookup file. Otherwise you will see a message box mentioning the location where the file was saved.
7. Undo the adjustment layers in the History panel or delete them in the Layers panel. Alternatively restart Photoshop (Elements) and open the same image file again.
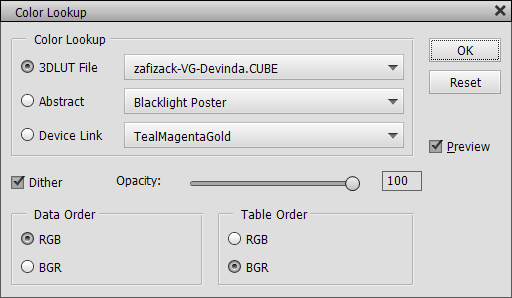
8. Choose the Color Lookup adjustment layer from Layer > New Adjustment Layer > Color Lookup. If you restarted Photoshop (Elements) and previously used the Save in Preset folder check box, you will find the lookup file on the 3DLUT File combo box. If not, click on the 3DLUT File combo box and choose the top "Load 3D LUT" item. On the appearing file dialog select your previously saved lookup file.
9. Now you can see the recorded effect applied. Press OK to close the dialog.
1. Open an RGB image in Photoshop (Elements).
2. For producing more precise color values in the lookup file choose Image > Mode > 16 Bits/Channel. But only do that if the filters that you want to apply support 16-bit images and if you do not want to additionally use at least one adjustment layer.
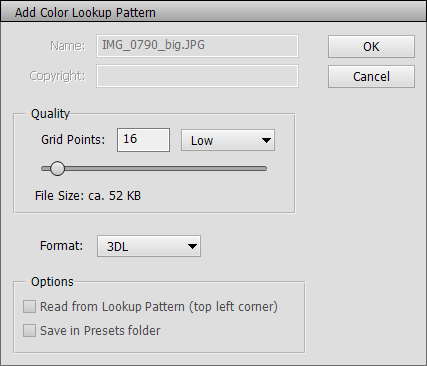
3. Choose Image > Add Color Lookup Pattern. On the appearing dialog you have to decide on the number of grid points and the format you want the lookup file to have. You cannot change these settings later, because then the lookup file will contain false values. We recommend 16 and 3DL settings for small files and 32 and CUBE or CSP settings for slightly better quality but larger files.
4. After clicking OK, you will see the lookup pattern at the top of your image. For larger grid points value the added pattern is larger.
5. Now apply your filters (and adjustment layers) to the image. Only apply filters that change the color, brightness, contrast, hue and saturation. Effects like blur, sharpening, noise, painting, distortion etc. cannot be recorded. You can also duplicate the layer and use blend modes. Producing a correct lookup file will be possible as long as the lookup pattern is still visible.
6. Choose File > Save > Color Lookup Table. Enter the name of the effect and your name at the top of the dialog. Do not change the Grid Points and Format settings. They have to stay the same, otherwise the lookup file will not reproduce the desired effect.
7. Make sure that the Read from Lookup Pattern check box is activated. If you activate the Save in Preset folder check box, the lookup file will appear as a preset on the Color Lookup dialog, but only after you restarted Photoshop (Elements).
8. Press the OK button. If you did not activate the Save in Preset folder check box, a file dialog will appear for saving the lookup file. Otherwise you will see a message box mentioning the location where the file was saved.
9. Undo the filters and the lookup pattern in the History panel. Alternatively restart Photoshop (Elements) and open the same image file again.
10. Choose the Color Lookup adjustment layer from Layer > New Adjustment Layer > Color Lookup. If you restarted Photoshop (Elements) and previously used the Save in Preset folder check box, you will find the lookup file on the 3DLUT File combo box. If not, click on the 3DLUT File combo box and choose the top "Load 3D LUT" item. On the appearing file dialog select your previously saved lookup file.
11. Now you can see the recorded effect applied. Press OK to close the dialog.
1. Open a portrait photo or photo of an object in Photoshop (Elements).
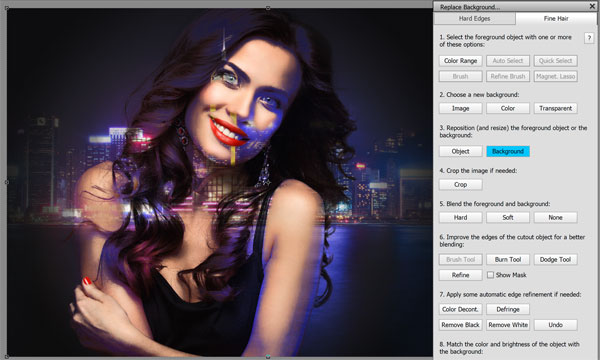
2. Go to Image > Replace Background.
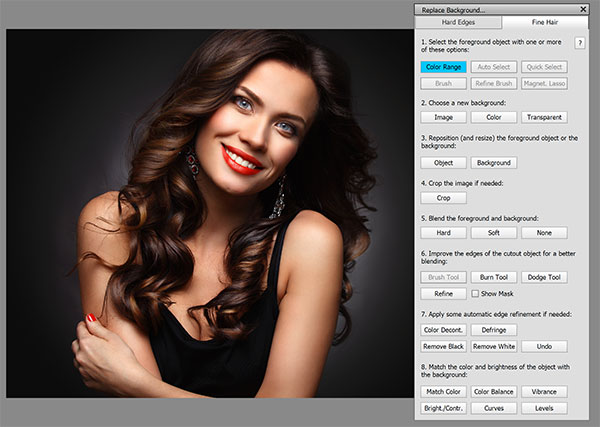
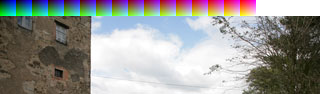
Photo Credits: Opolja
/ Dreamstime
3. Click the Fine Hair tab sheet if the person in the photo has fine hairs that are visible against the background.
4. Click the
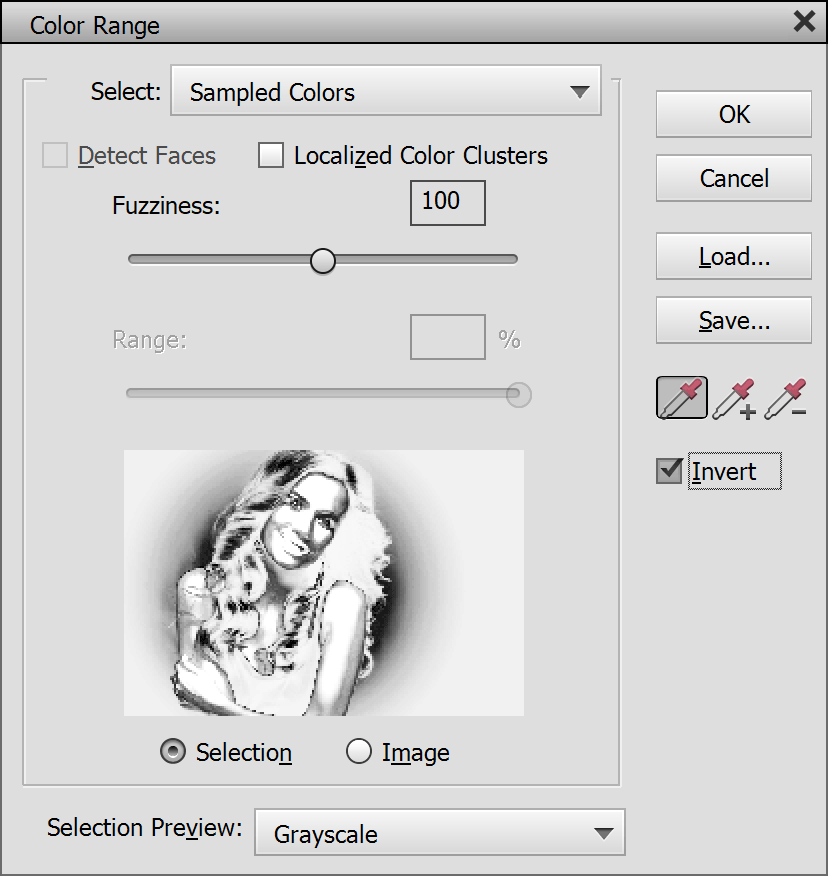
Color Range button (step 1). Then click on the image until you masked
out the hair as good as possible. The hair and the person have to be white in
the grayscale preview and the background has to be black. If you can only mask
by clicking on a uniform background, activate the Invert check box to get
the
person
and hair white again. You can hold down the Shift
and Alt key when clicking
to add or remove certain colors.
In the example above it was quite difficult
to mask the black hair from the black background. I clicked on the
hair until the hair stood out from the spot light. Additionally I activated
the Invert
check box to get the hair white. As the background is also white and
the person contains black areas, we have to do some additional brush work later.
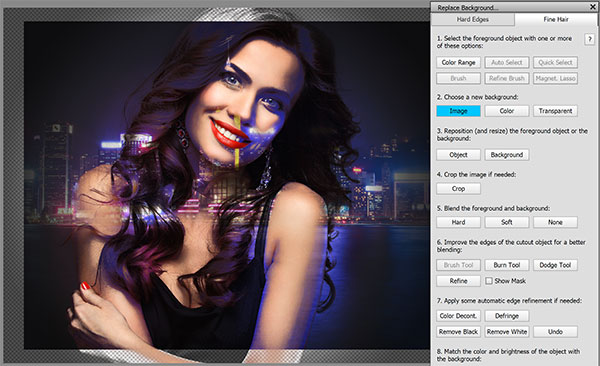
Background Photo Credits:
Chunhahca / Dreamstime
5. Click on the Image button (step 2) and select a new background image from the file dialog. If you want to manually add a background later, you can also click the Color or Transparent buttons instead. The masked person is now displayed masked above the new background image.
6. Click the Object or Background button (step 3) to select the person or background and then use the automatically activtaed move tool to resize or reposition it. In the example case we increased the size of the background to remove the transparent borders..
7. You can also crop away a part of the image (step 4) by clicking the Crop button and using the crop tool. In the example this was not necessary.
8. You can try Hard and Soft blending (step 5) by clicking the appropriate button. If you do not like the result, click the None button, which was done here.
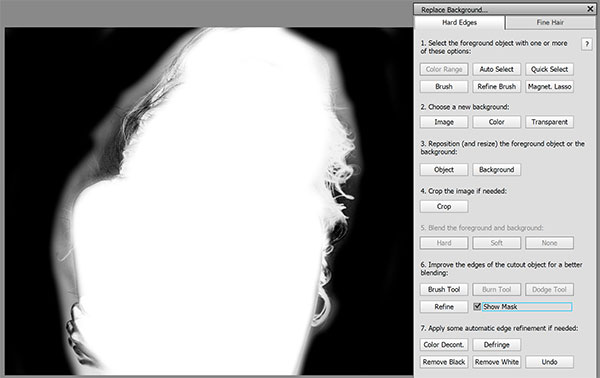
9. Now we have to do some more manual brush work (step 6). Activating the Show Mask check box helps a lot to see where brushing is actually needed. For fine hair brush work you normally only need the Burn and Dodge tools. In the example there is a lot more rough masking to do, so I clicked the Brush Tool button. Then I used the brush tool with white color to mask the person while leaving the outer hairs untouched. Then I used a black color brush to paint over the white background areas. The hair area were left untouched for now. You can see the result above.
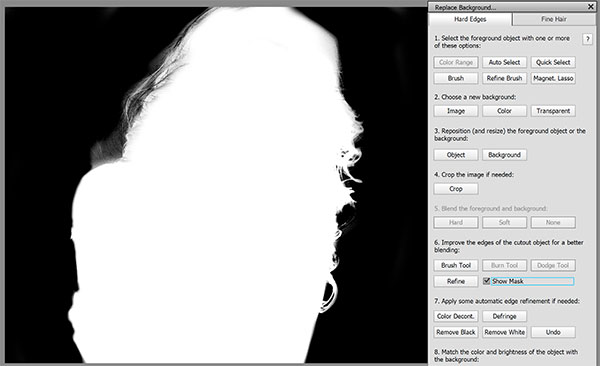
Now I used the Burn and Doge tools (by clicking the appropriate buttons which automatically activates the required tool options) to refine the borders of the mask and make the hair stand out.
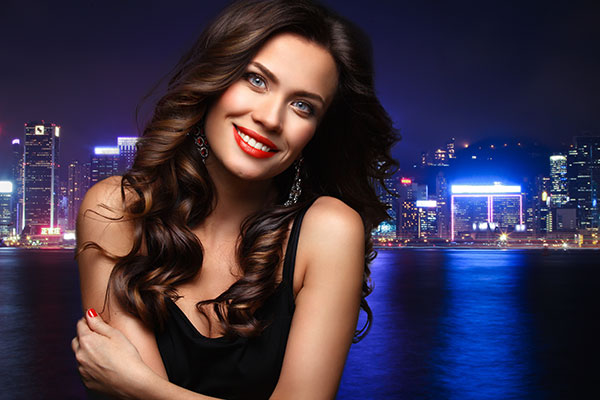
After deactivating the Show Mask check this result is shown.
10. If there are some thin border pixels that you did not manage to remove manually, you can use the buttons in step 7 to automatically remove them. If you do not like the results, you can click the Undo button. In the example it was not necessary.
11. Now we have to adjust the color and brightness of person to the background (step 8) with one of the various options. In the example it does not look good to give the person the blue cast of the backround, because the skin tones get unattractive that way. But increasing the vibrance makes the person match better to the background photo.
12. After you are finished you can click on the x icon in the title bar of the Replace Background dialog. You will see the person and background as layers in the Layer panel and can do some manual step if needed.
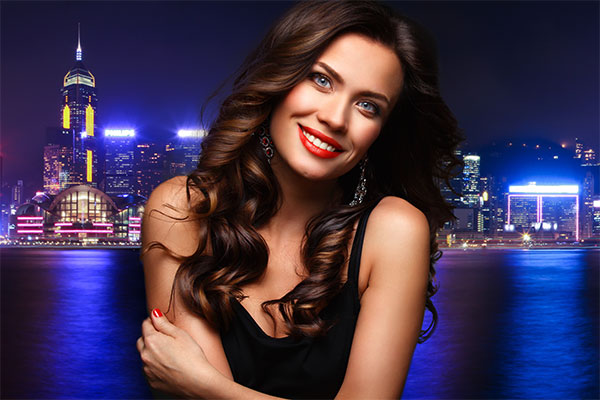
In the example I wanted to improve the look of the background. I could have done that in step 3, but the background was too opaque back then (because of the incomplete masking) to effectively adjust it. So I moved the person to the middle of the image, moved the background to the left to reveal the tower on the left hand-side. To fill the transparent area on the right-hand side, I duplicated the background layer and flipped it horizontally to make it seamless. Then I moved the duplicate background layer to the right hand-side. I hid the seamless border, which looks too artificial, behind the person.