To run the Picture Editor simply choose Picture Editor from the View
menu or press the F9 key. You can open or load an image into the Picture
Editor by double clicking an image file in the main window or double clicking
an image in the Browser. You can also open
an image directly in the Picture Editor by using Open, Acquire Image from the
File menu or Paste from the Edit menu.
The Picture Editor is also used to display the results of a Photoshop-compatible 8bf plugin which was e.g. double clicked in the main window. Pressing the Apply/Big View button in the FF Editor will also display the result of the Filter Factory filter in Picture Editor.
1. File Menu
Open
Lets you open an image that will be displayed in Picture Editor.
Save / Save As
Saves the currently displayed image.
Select Source
Lets you select a scanning device.
Acquire Image (Pro Edition only)
Invokes an TWAIN-compatible scanning dialog for scanning an image.
Print (Pro Edition only)
Prints the displayed image in its actual size or scaled to the printing page proportions.
Exit
Exits Picture Editor.
2. Edit Menu
Undo
Restores the state of the image before the last action.
Copy
Copies the image to the clipboard.
Paste
Retrieves an image from the clipboard.
Resize Image (Pro Edition only)
Lets you define a new pixel size (e.g. 640x480) or enter a percentage amount for changing the size of the current image.
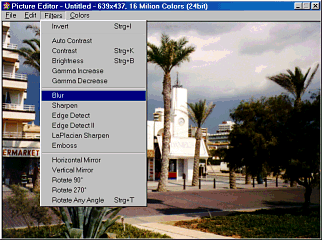
3. Filters Menu (Pro
Edition only)
You can find different commands in the Filters menu for manipulating the image e.g. Invert, Contrast, Brightness, Gamma, Blur, Sharpen, Edge Detect, Emboss, Mirror and Rotate. These are standard functions that you should know from other image editing tools. If you do not know what they do just try them.
 The External Plugins menu item will display a dialog that lets you apply
a Photoshop-compatible plugin to the image displayed in the Picture Editor.
The Select Folder button lets you select a new folder with plugins. The
plugin categories are displayed in the left list box and the plugins in the
right one.
The External Plugins menu item will display a dialog that lets you apply
a Photoshop-compatible plugin to the image displayed in the Picture Editor.
The Select Folder button lets you select a new folder with plugins. The
plugin categories are displayed in the left list box and the plugins in the
right one.
To run and apply a plugin effect select a plugin in the right
list and press the Run button or just double click it. The calculated
effect will be automatically displayed in the Picture Editor window. You can
apply several plugins without the need to leave the External Plugins dialog.
When you don't want to apply any more effects, simply click the OK button
to leave the dialog. If you want to undo all effects you applied from this dialog,
click the Cancel button. Even if you left the External Plugins dialog
with the OK button, you can still undo all changes with the Undo command from
the Edit menu.
4. Colors Menu (Pro Edition only)
The Colors menu offers different color conversion options to choose from. You can change the currently displayed image to 2 color, 16 color, 256 colors by using the standard Octree color reduction or Floyd Steinberg dithering. Additionally a greyscale and 16 million color mode is also offered.
Tip: If you want to save the current image as a gif file, you should select 256 Colors Dithered from the Colors menu firstly.